Macにおける開発環境の構築方法のひとつであるDockerをインストールする手順を解説しまーす。
- Mac mini (M1, 2020)
- macOS Sonoma 14.2.1
Dockerのインストール
Dockerインストーラのダウンロード
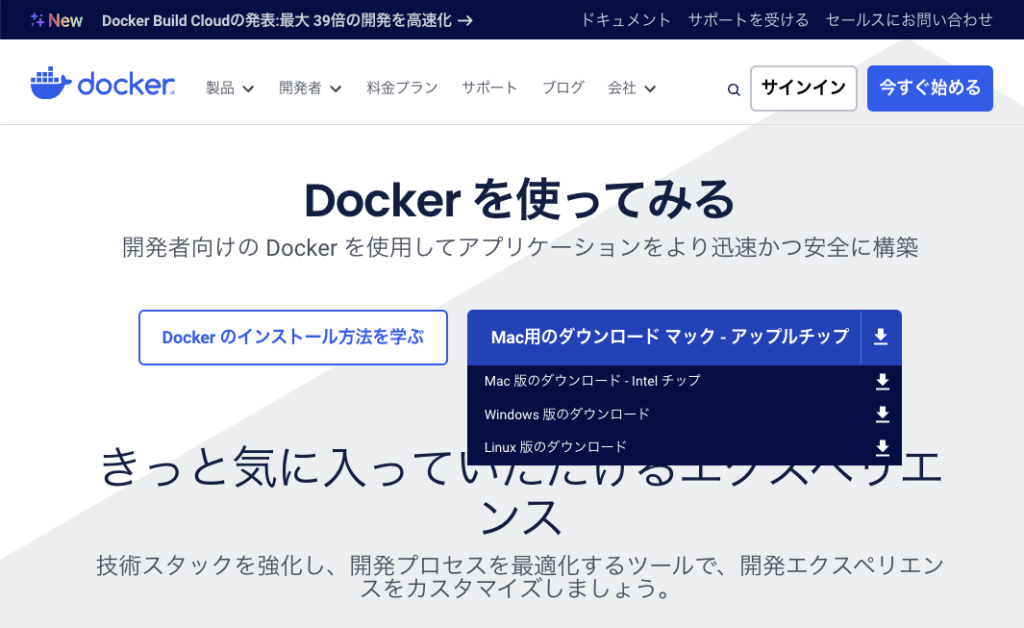
まず下記のページへ行って、Docker Desktop for Macをダウンロードします。
AppleシリコンMacならば「アップルチップ」を、Intel Macならば「Intel チップ」を選択してクリックします。
Dockerのインストール
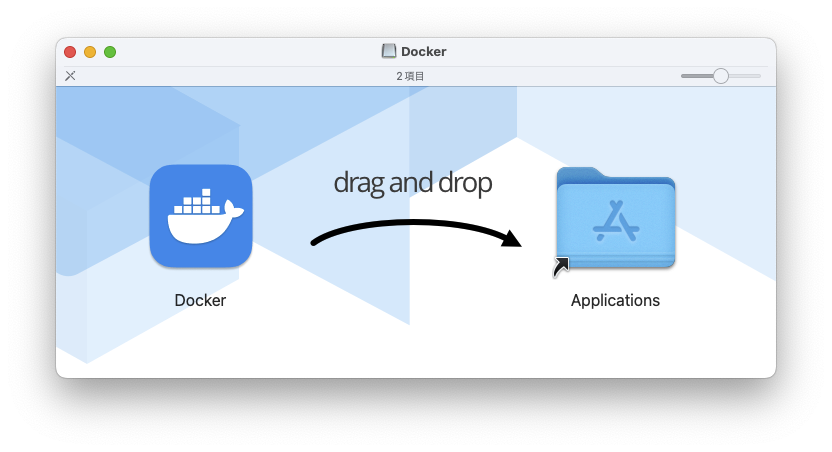
ダウンロードした Docker.dmg をダブルクリックします。以下のウインドウが開くのでDockerアイコンをApplicationsフォルダにドラッグ&ドロップします。
アプリケーションフォルダのDockerをダブルクリックして起動します。LaunchpadのDockerをクリックでもOKです。
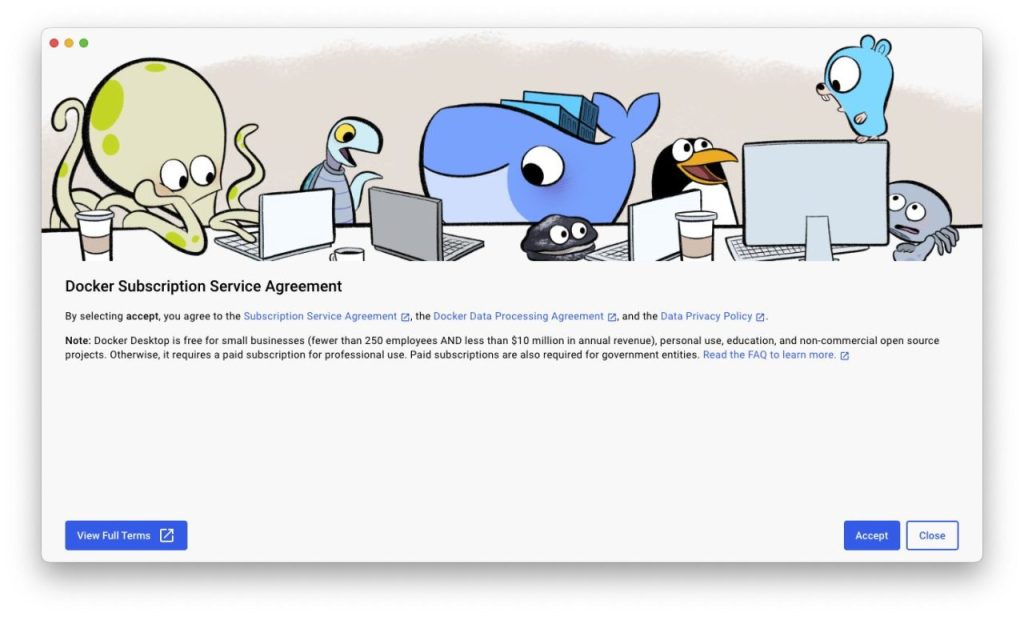
初めて起動したときには以下のウインドウが表示されるので「Accept」をクリックします。
Docker Subscription Service Agreement
By selecting accept, you agree to the Subscription Service Agreement, the Docker Data Processing Agreement, and the Data Privacy Policy.
Note: Docker Desktop is free for small businesses (fewer than 250 employees AND less than $10 million in annual revenue), personal use, education, and non-commercial open source projects. Otherwise, it requires a paid subscription for professional use. Paid subscriptions are also required for government entities. Read the FAQ to learn more.
Dockerサブスクリプションサービス契約
同意するを選択すると、サブスクリプションサービス契約、Dockerデータ処理契約、およびデータプライバシーポリシーに同意したことになります。
注:Docker Desktopは、中小企業(従業員250名未満、年間売上1000万ドル未満)、個人利用、教育、非商用のオープンソースプロジェクトには無料でご利用いただけます。それ以外のプロフェッショナルな利用には有償サブスクリプションが必要です。また、政府機関の場合は有料サブスクリプションが必要です。詳しくはFAQをご覧ください。
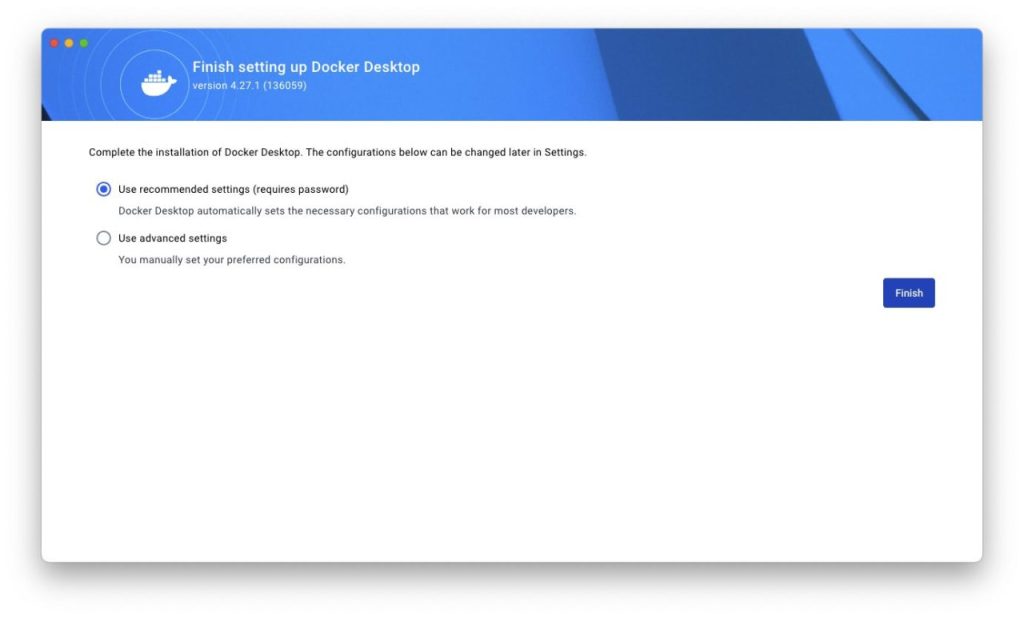
次に以下の画面が表示されます。「Use recommended settings」を選択して「Finish」をクリックします。
Complete the installation of Docker Desktop. The configurations below can be changed later in Settings.
○ Use recommended settings (requires password)
Docker Desktop automatically sets the necessary configurations that work for most developers.
○ Use advanced settings
You manually set your preferred configurations.
Docker Desktopのインストールを完了します。以下の設定は、後で「設定」で変更することができます。
○ 推奨設定を使用する(パスワードが必要)
Docker Desktopは、ほとんどの開発者に必要な設定を自動的に行います。
○ 詳細設定を使用する
お好みの設定を手動で設定します。
アカウントの登録とサインイン
Docker Desktopの設定が完了するとアカウント登録画面が表示されます。
Welcome to Docker Desktop
Sign in to connect to your Docker Desktop subscription or access online features.
Docker Desktopへようこそ
サインインしてDocker Desktopサブスクリプションに接続するか、オンライン機能にアクセスしてください。

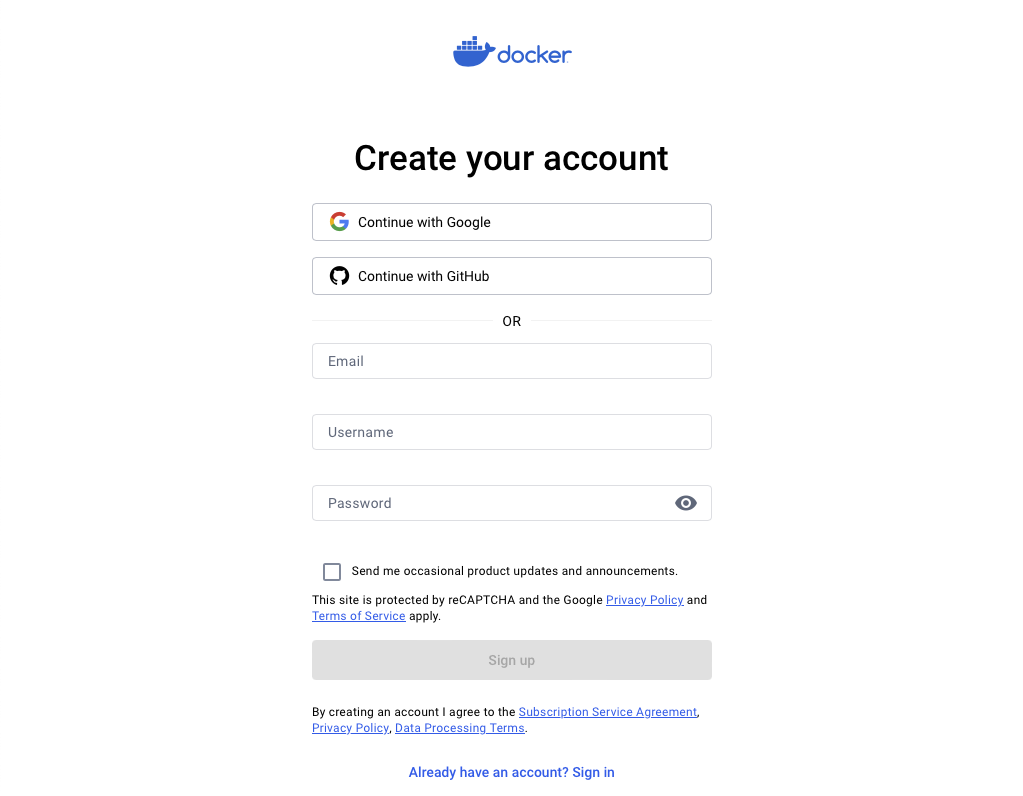
アカウントを持っていなくて作成するならば「Sign up」、すでに持っているならば「Sign in」、サインインしないで利用するならば「Continude without signing in」をクリックします。
私は「Sign up」をクリックしました。
ウェブブラウザでアカウント作成画面が表示されます。お好きな方法で作成してください。
サインイン画面です。サインインしてください。
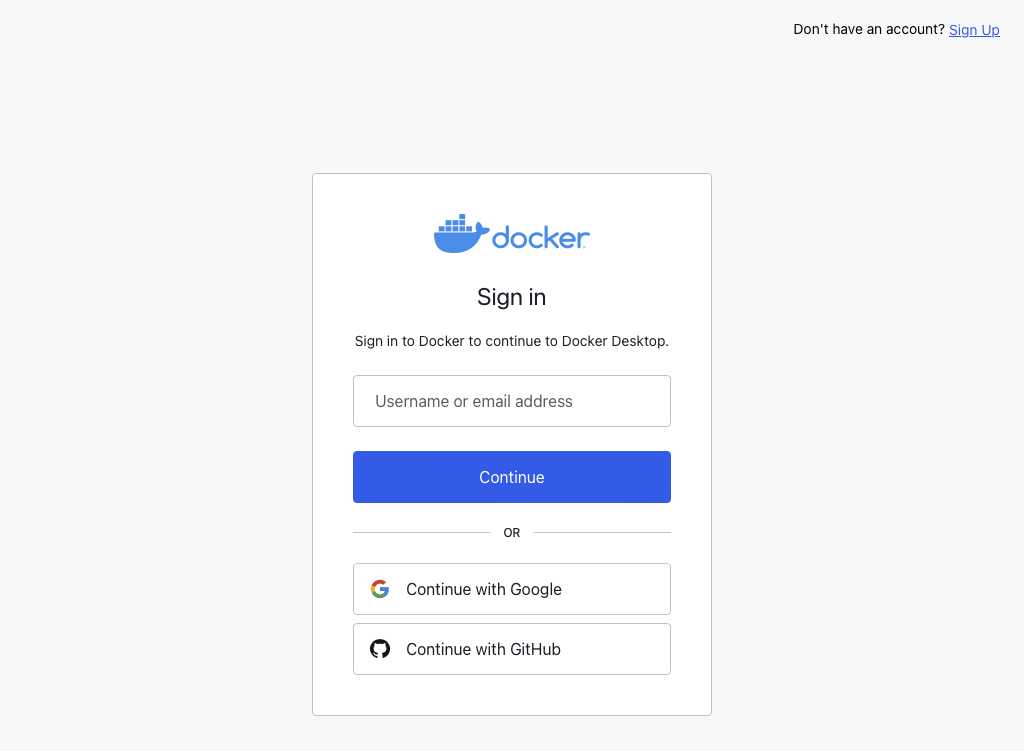
無事サインインできましたが、メールアドレスの確認が済んでいないとやさしく怒られました。メールが届いているはずなのでverifyしましょう。

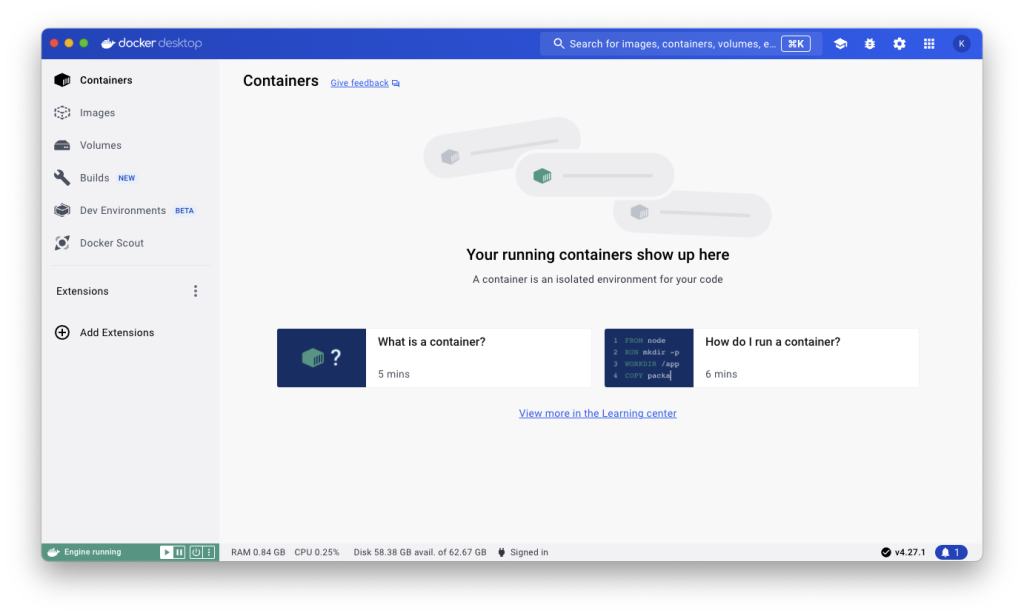
インストール完了
Docker Desktopアプリに戻ってください。以下の画面が表示されていたらインストール完了です。
Dockerの動作確認
ターミナルを起動して、コマンドdocker -vを実行してみてください。バージョン番号が表示されたでしょうか。
% docker -v
Docker version 25.0.2, build 29cf629もっとやりたいならば、コマンドdocker run hello-worldを実行してみましょう。
% docker run hello-world
Unable to find image 'hello-world:latest' locally
latest: Pulling from library/hello-world
478afc919002: Pull complete
Digest: sha256:4bd78111b6914a99dbc560e6a20eab57ff6655aea4a80c50b0c5491968cbc2e6
Status: Downloaded newer image for hello-world:latest

Hello from Docker!
This message shows that your installation appears to be working correctly.

To generate this message, Docker took the following steps:
 1. The Docker client contacted the Docker daemon.
 2. The Docker daemon pulled the "hello-world" image from the Docker Hub.
    (arm64v8)
 3. The Docker daemon created a new container from that image which runs the
    executable that produces the output you are currently reading.
 4. The Docker daemon streamed that output to the Docker client, which sent it
    to your terminal.

To try something more ambitious, you can run an Ubuntu container with:
 $ docker run -it ubuntu bash

Share images, automate workflows, and more with a free Docker ID:
 https://hub.docker.com/

For more examples and ideas, visit:
https://docs.docker.com/get-started/イメージ「hello-world:latest」がローカルに見つかりません
latest: library/hello-world から取り出します
478afc919002: 取り出し完了
Digest: sha256:4bd78111b6914a99dbc560e6a20eab57ff6655aea4a80c50b0c5491968cbc2e6
Status: hello-world:latestの新しいイメージをダウンロードしました
Dockerからこんにちは!
このメッセージは、インストールが正常に動作していることを示しています。
このメッセージを生成するために、Dockerは以下のステップを踏みました:
- DockerクライアントがDockerデーモンにコンタクトした。
- DockerデーモンがDocker Hubから “hello-world “イメージを取り出した。(arm64v8)
- Dockerデーモンはそのイメージから新しいコンテナを作成し、現在読んでいる出力を生成する実行ファイルを実行した。
- Dockerデーモンはその出力をDockerクライアントにストリーミングし、Dockerクライアントはそれをあなたのターミナルに送信する。
もっと野心的なことを試すには、Ubuntuコンテナを次のように実行する:
docker run -it ubuntu bash
無料のDocker IDを使って、イメージの共有やワークフローの自動化などを行おう:
https://hub.docker.com/
その他の例やアイデアについては、以下をご覧ください:
https://docs.docker.com/get-started/
1行目のdocker run hello-worldは、hello-worldというイメージからコンテナを作成して実行するコマンドです。
2〜6行目は、イメージhello-world:latestがローカルに見つからないので、Docker Hubからダウンロードしたことをあらわすメッセージです。:latestはイメージのタグで、バージョンなどを指定します。何も指定しなければ自動的に:latestになります。
8行目以降は、hello-worldの出力です。
ターミナルでdocker imagesを実行してください。ダウンロード済みのイメージ一覧を表示するコマンドです。
% docker images
REPOSITORY    TAG       IMAGE ID       CREATED        SIZE
hello-world latest ee301c921b8a 9 months ago 9.14kBターミナルでdocker psを実行してください。起動中のコンテナ一覧を表示するコマンドです。
% docker ps
CONTAINER ID IMAGE COMMAND CREATED STATUS PORTS NAMESあれれれれ?何も表示されませんね。コンテナhello-worldは出力が終わると終了してしまうためです。
docker ps -aコマンドで、停止中も含めたすべてのコンテナの一覧を表示できます。
% docker ps -a
CONTAINER ID   IMAGE         COMMAND    CREATED        STATUS                    PORTS     NAMES
cd70736a3ecf   hello-world   "/hello"   17 hours ago   Exited (0) 17 hours ago             elastic_banzai
Dockerのアンインストール
MacからDocker Desktopをアンインストールするには次のようにします。
- メニューバーのDockerアイコンをクリックする。
- Troubleshootメニューを選択する。
- Uninstallボタンをクリックする。
さいごに
以上がDocker Desktop for Macのインストール手順です。
Desktopとか言いながら、実際に環境構築していくときはコマンドラインで作業をしていきます。そういうもんです。
PHPの開発環境構築は下記の記事をどうぞ。

でわでわ

コメント