2023年10月19日、VMware Fusionのバージョン 13.5 がリリースされました。いえーい。バージョン番号的には13と比べて0.5のアップグレードですが、かなり大幅に機能強化されています。
この記事では、VMware Fusion 13.5を使ってAppleシリコンMacにWindows 11をインストールする手順を詳しく解説します。個人利用は無料でーす。
- Mac mini (M1, 2020)
- macOS Sonoma 14.0
- VMware Fusion Player 13.5.0
VMware Fusion 13.5の新機能
簡単にWindowsを入手できる Get Windows 機能
これまで、VMwareの仮想マシンにWindowsをインストールするには、とても面倒な手順を踏んでインストールディスクを入手する必要がありました。
VMware Fusion 13.5では、仮想マシン作成ウィザードで簡単にWindowsのインストールディスクを入手することができます。
Windows 11 for ARMでDirectX 11をサポート
AppleシリコンMac上のWindowsでDirectX 11がサポートされます。グラフィックス性能が向上し、いろんなゲームやCADアプリが動くようになりました。
AppleシリコンMac上のVMware Toolsの機能強化
AppleシリコンMacとWindows間のドラッグ&ドロップ、クリップボード共有ができるようになりました。また、コンソールウインドウのサイズ変更に合わせてゲストOSの解像度が動的に変更されるようになりました。
セキュリティとコントロールの強化
仮想マシンの暗号化方式が強化され、CBCからXTSになりました。
VMware Fusion のライセンスキー取得とダウンロード
ここからは、初めてVMware Fusionをインストールする人向けの解説になります。
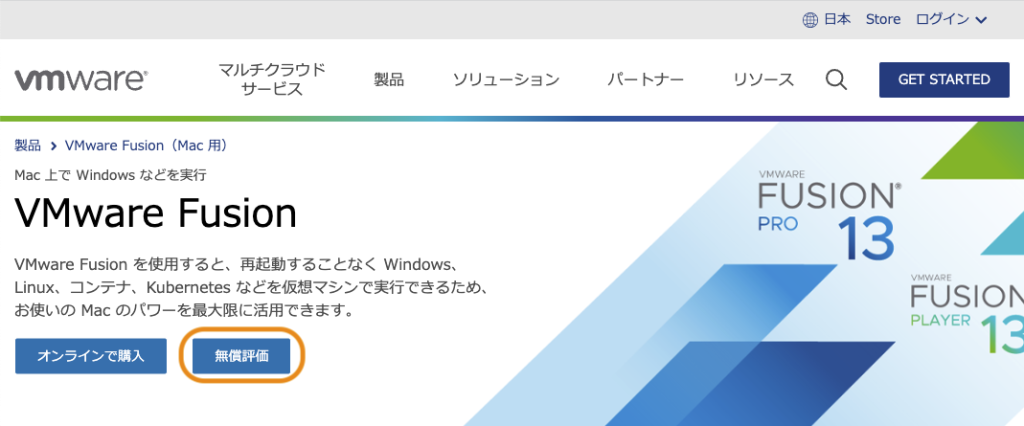
VMware Fusionのページへ行き「無償評価」ボタンをクリックします。VMware Fusion Playerは個人利用ならば無料で使うことができます。
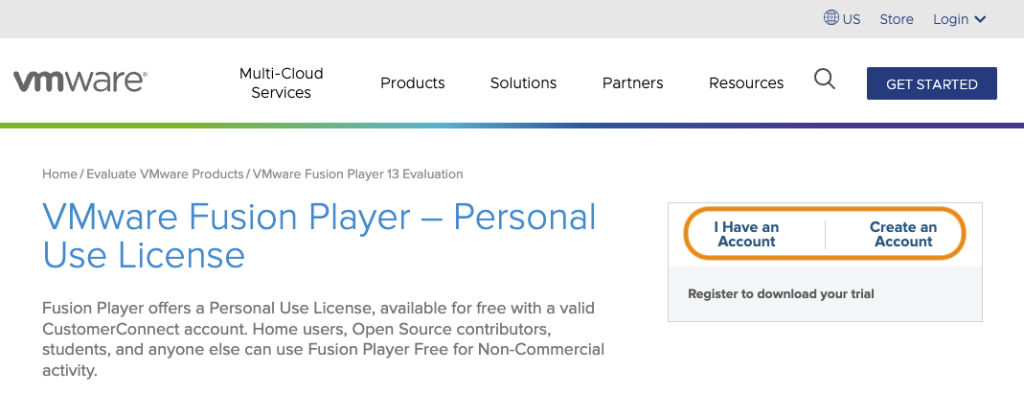
次のページの中ほどにある「個人利用ライセンスの登録」をクリックします。

VMware Customer Connect にログインします。すでにアカウントを持っているならば「I Have an Account」をクリックします。まだならば「Create an Account」をクリックします。
「I Have an Account」をクリックするとログイン画面が表示されるので、アカウント名とパスワードを入力して「SIGN IN」をクリックします。

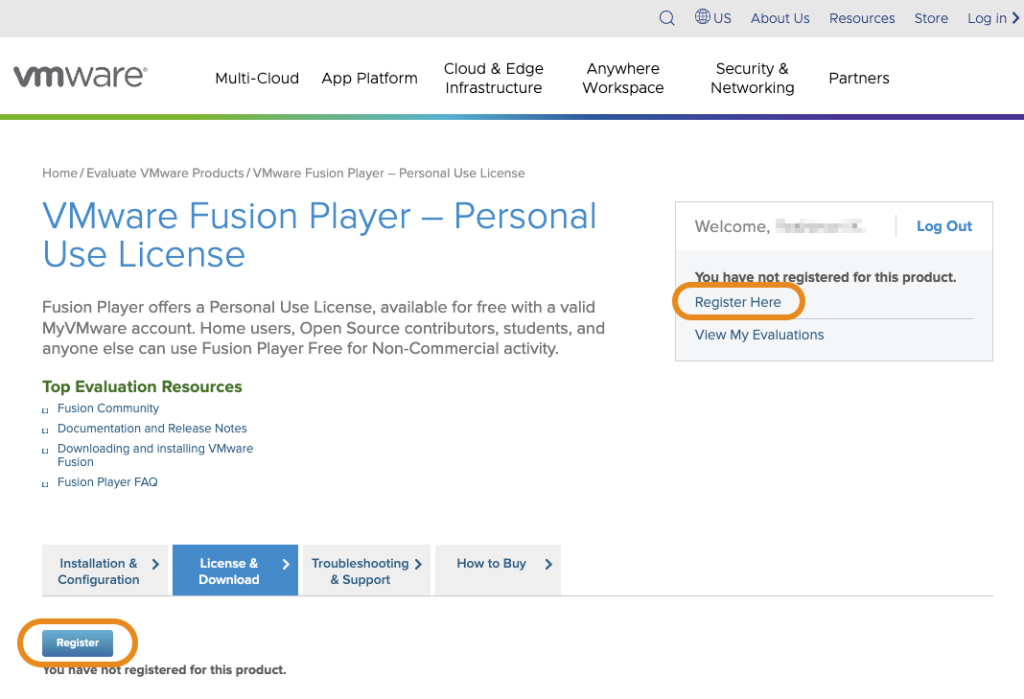
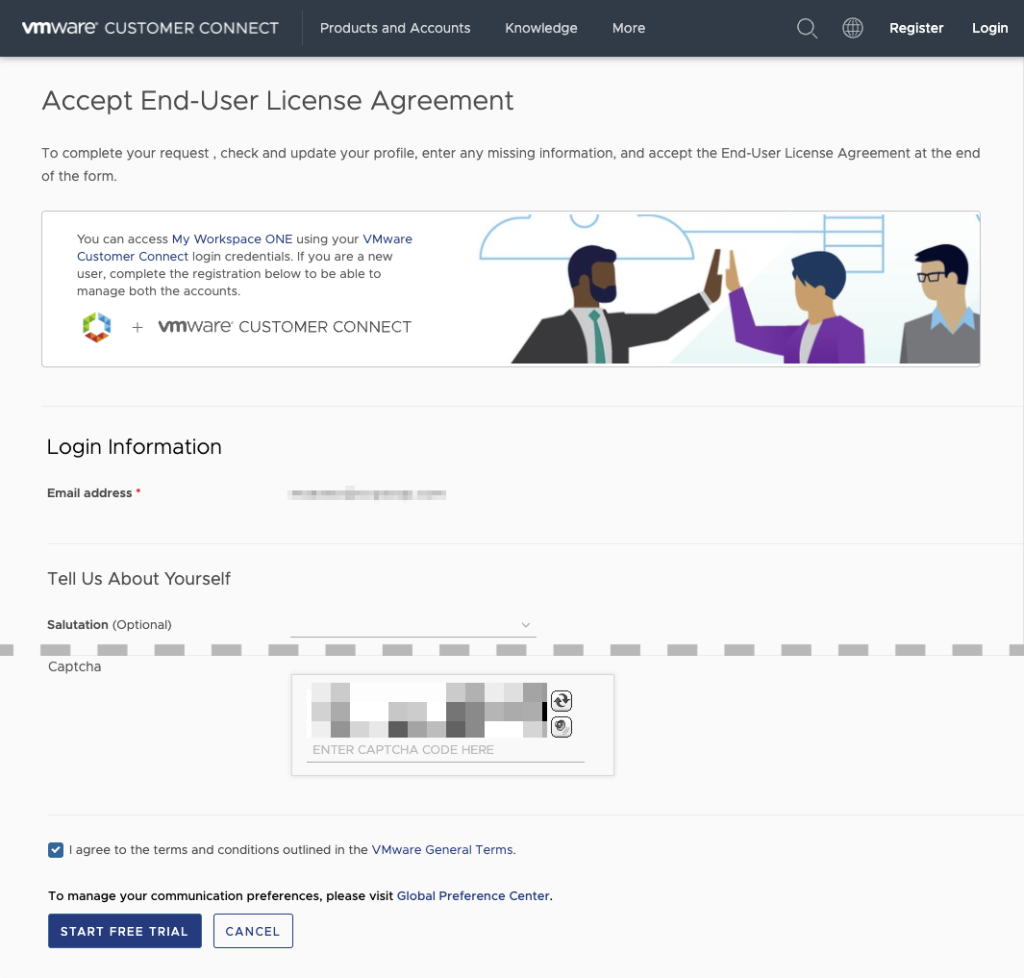
ログインしたら、右上の「Register Here」または左下の「Register」をクリックします。どっちでも同じです。
フォームが表示されるので入力して「START FREE TRIAL」をクリックします)。
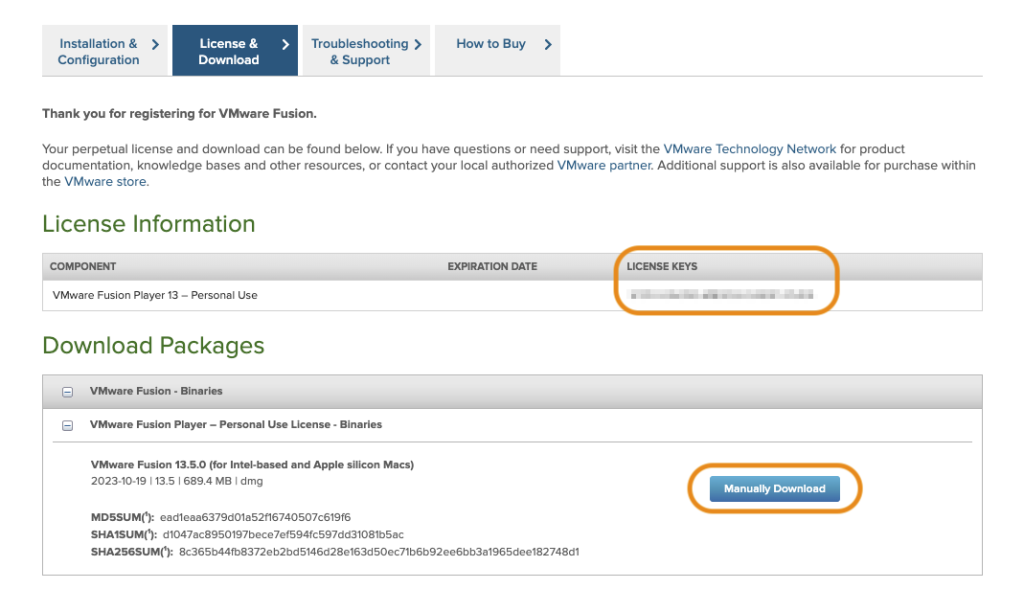
ライセンスキーが表示されたら、コピペして保存しておきましょう。
そして「Manually Download」をクリックするとアプリをダウンロードすることができます。
VMware Fusionのインストール
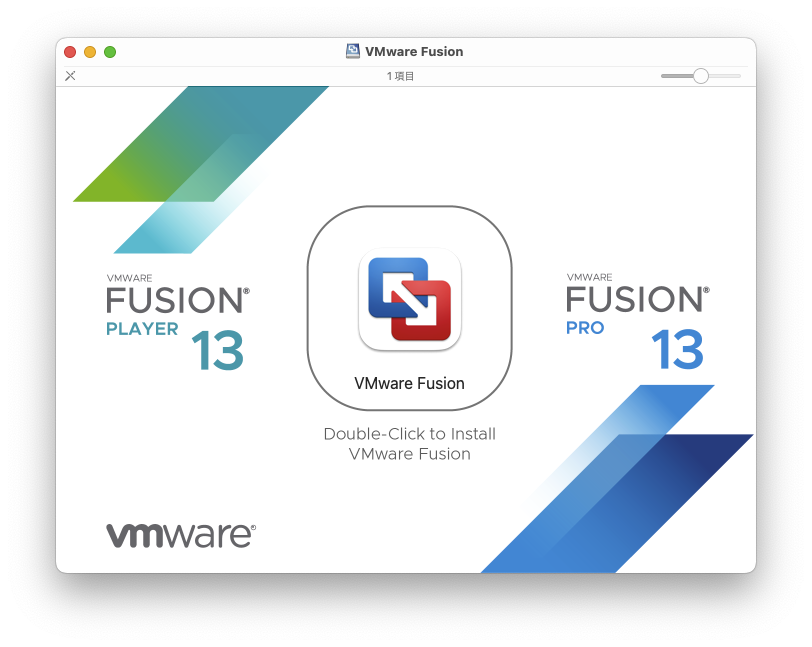
ダウンロードしたDMGファイルをダブルクリックしてディスクイメージをマウントします。
ウインドウが開いたら、真ん中のアイコンをダブルクリックしてインストールを開始します。
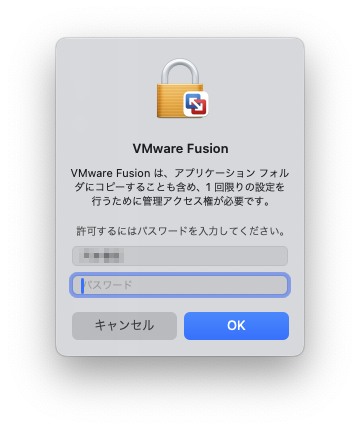
Mac の管理者パスワードの入力を求められるので、入力して「OK」ボタンをクリックします。
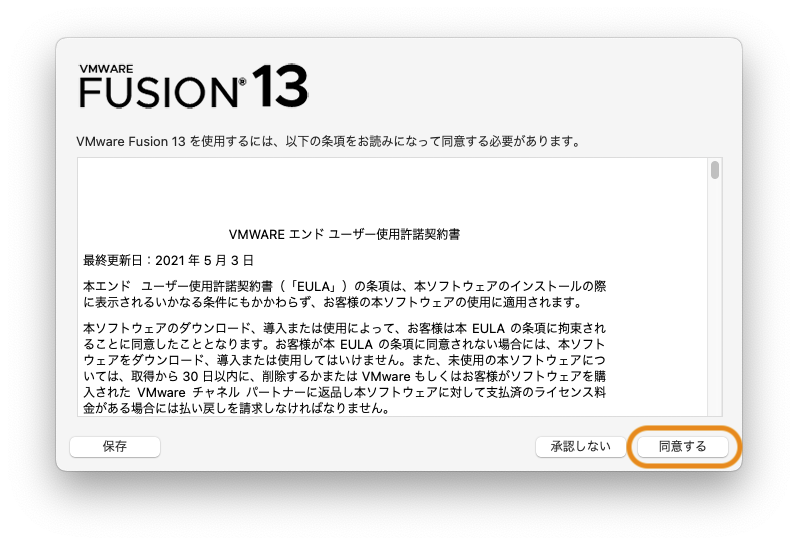
VMWARE エンドユーザー使用許諾契約書が表示されるので、よく読んで(または読まずに)「同意する」ボタンをクリックします。
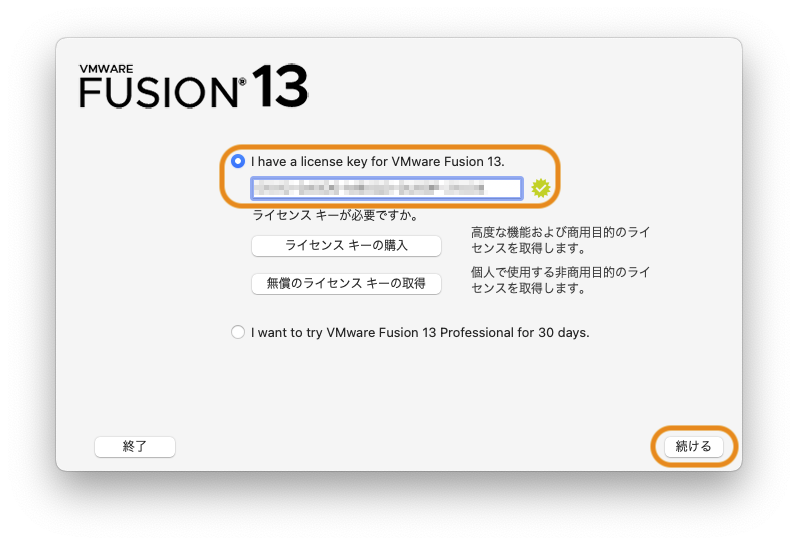
先ほど保存しておいたライセンスキーを入力して「続ける」ボタンをクリックします。
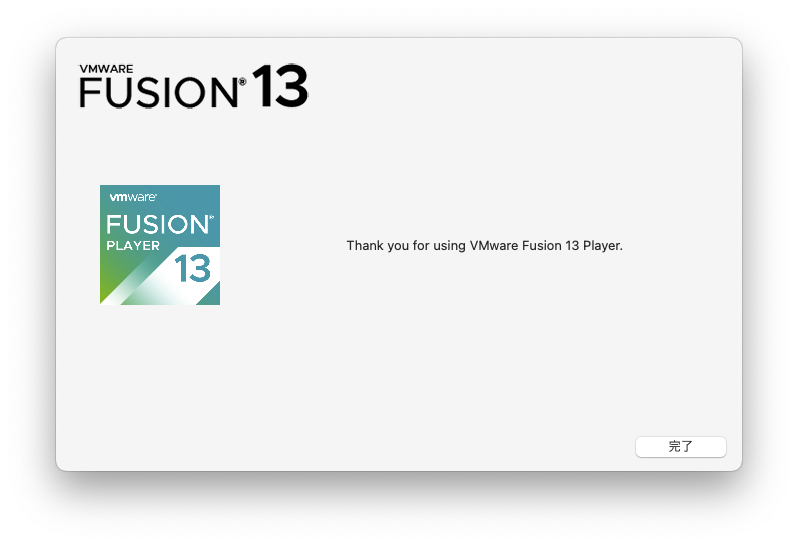
以上でVMware Fusionのインストールは完了です。
仮想マシンの作成とWindowsのダウンロード
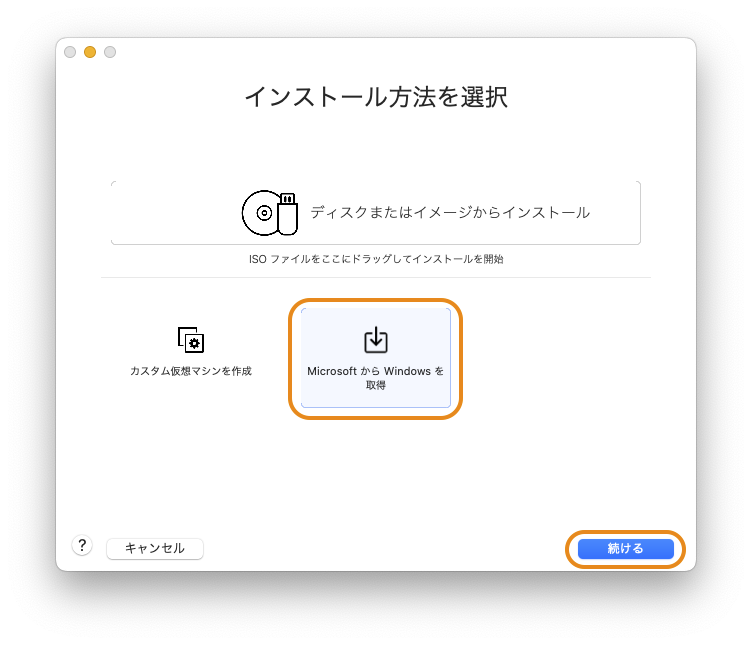
VMware Fusionのインストールが完了すると、次のウインドウが表示されます。表示されなければメニューバーの「ファイル > 新規…」を選択してください。
「MicrosoftからWindowsを取得」を選択して「続ける」をクリックします。
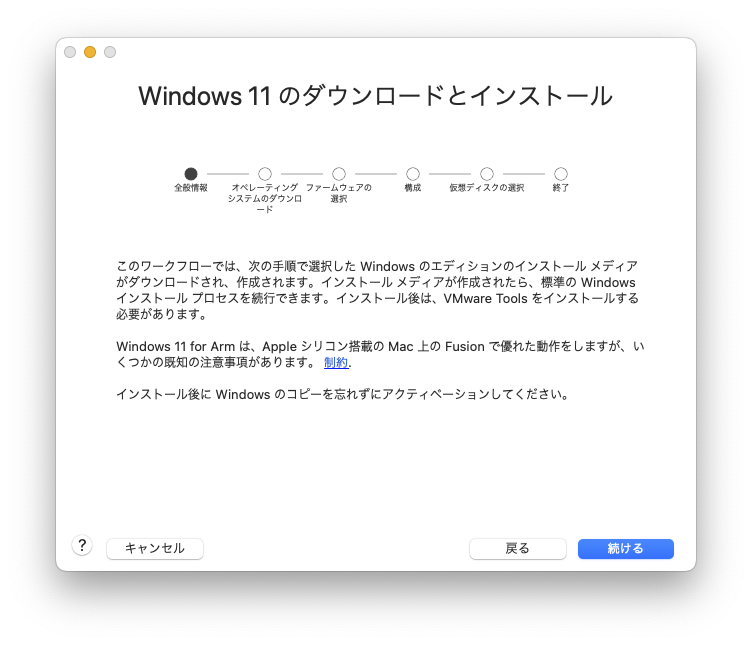
Windows 11のダウンロードとインストールに関する説明です。読んだら「続ける」をクリックします。
Windowsのエディションと言語を選択して「Windows のダウンロード」をクリックします。
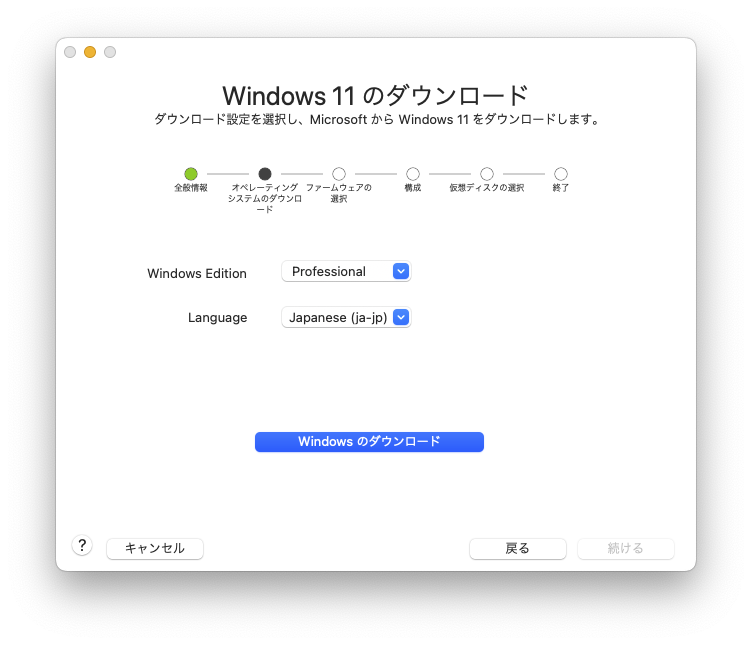
インストールディスクのダウンロードが始まります。私の環境では10分ほどかかりました。
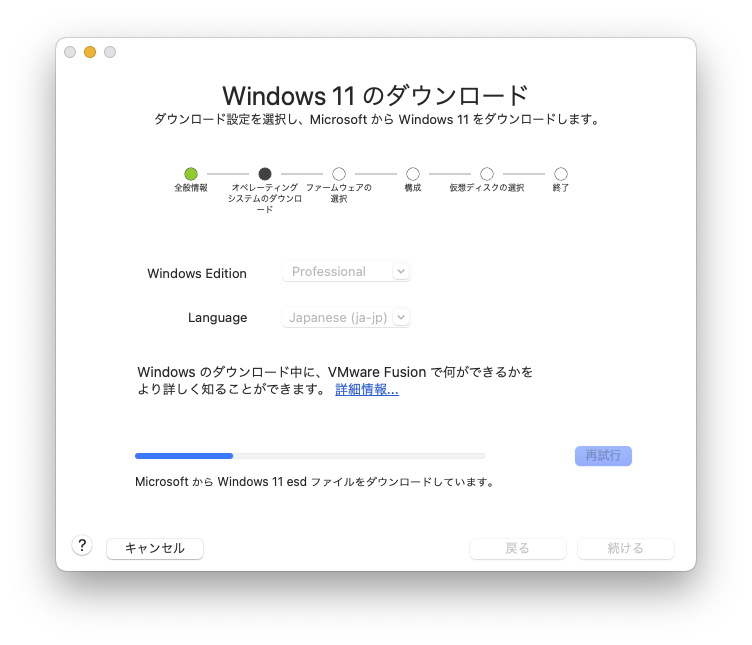
ダウンロードが完了したら「続ける」をクリックします。

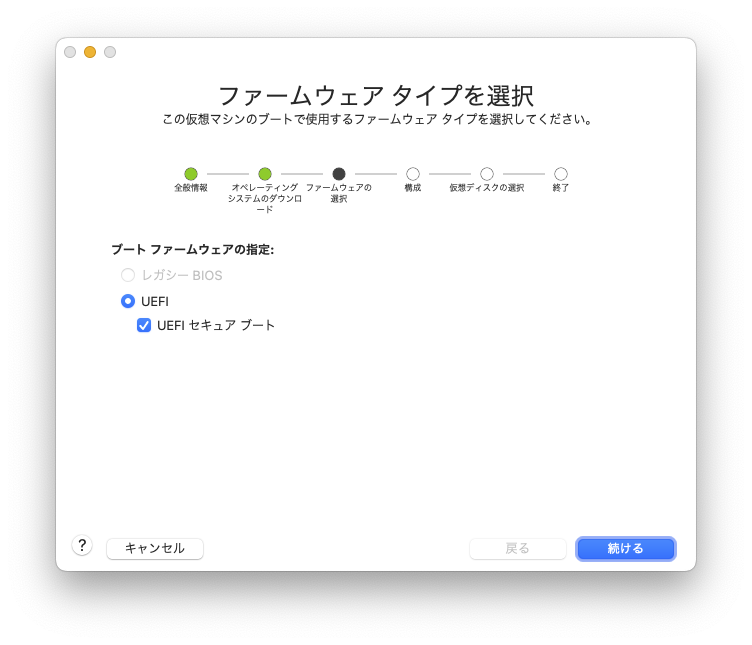
「UEFI」と「URFI セキュアブート」を選択して「続ける」をクリックします。
「Auto Generate Password」をクリックすると自動的にパスワードが生成されます。また「Remember Password and store it in Mac’s Keychain」にチェックを入れると、このパスワードをキーチェーンに保存してくれます。
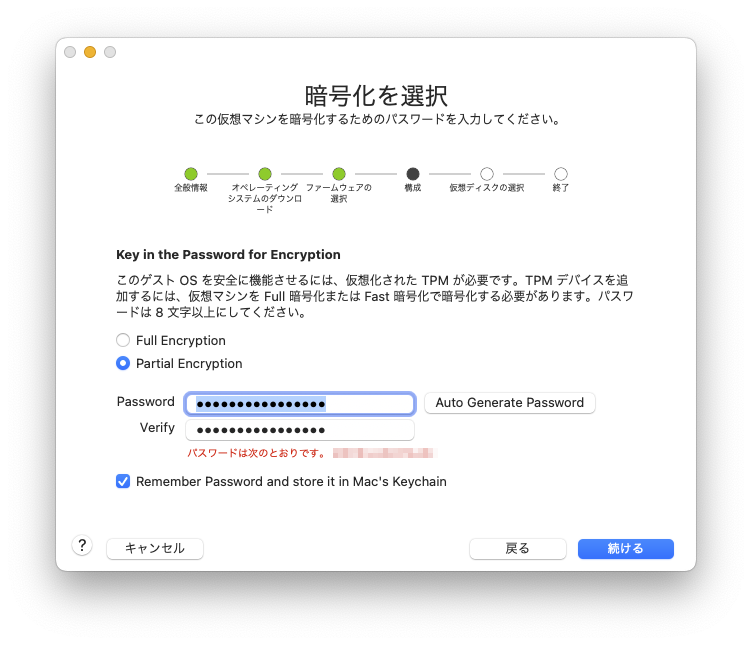
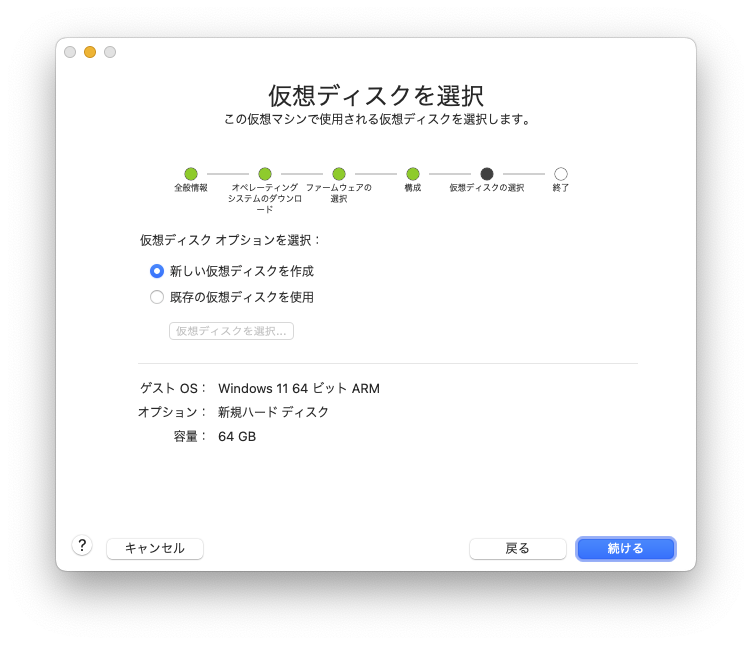
いずれかを選択して「続ける」をクリックします。
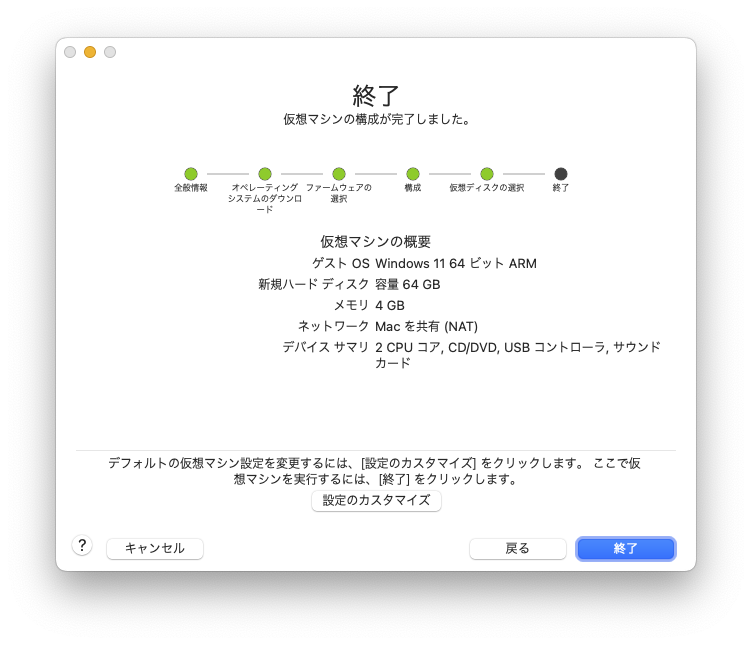
仮想マシンの概要が表示されるので、問題なければ「終了」をクリックします。
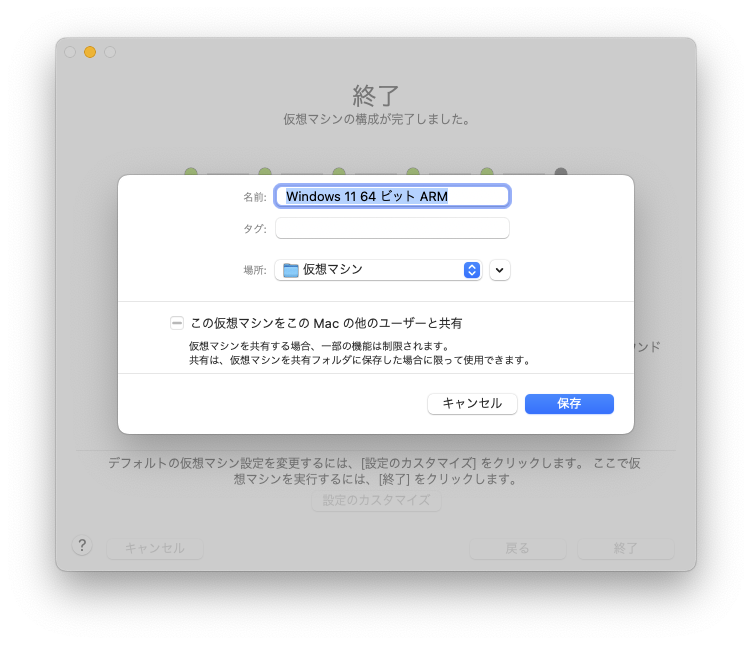
ダイアログが表示されます。仮想マシンの名前や保存場所を指定して「保存」ボタンをクリックします。
Windows 11のインストール
仮想マシンの作成を終えると自動的に仮想マシンが起動します。
「Press any key to boot from CD or DVD…」と表示されたら、すばやく何らかのキーを押してください。すばやく押す必要があります。
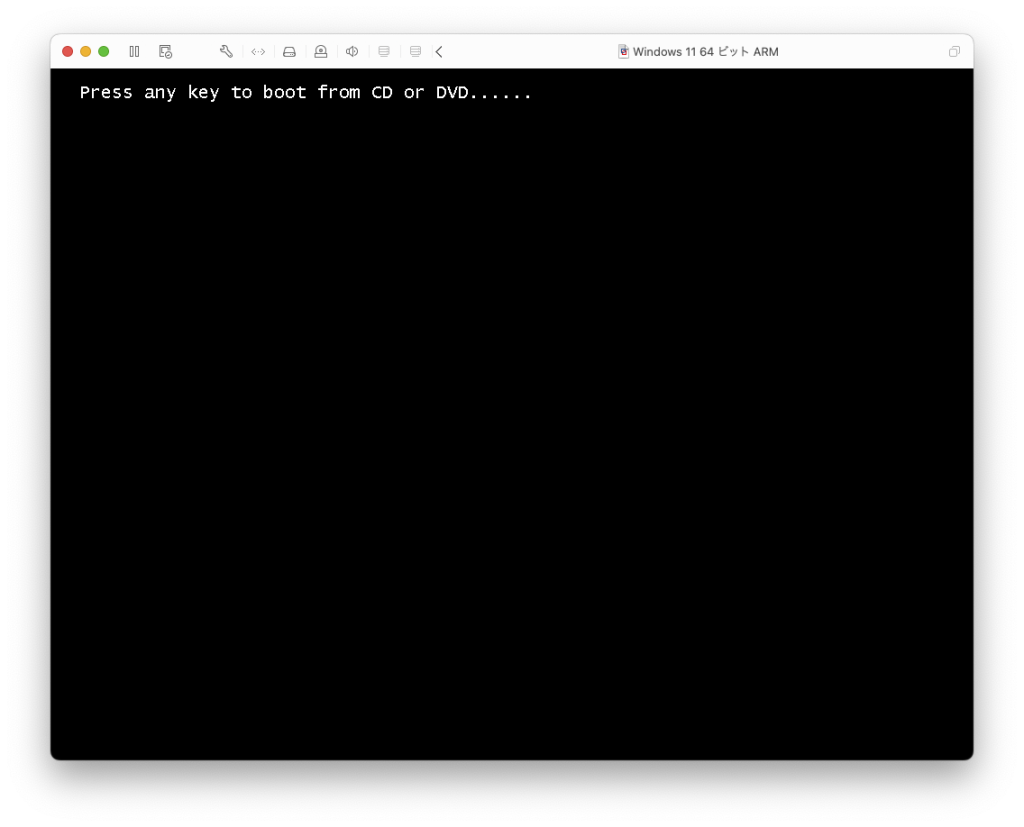
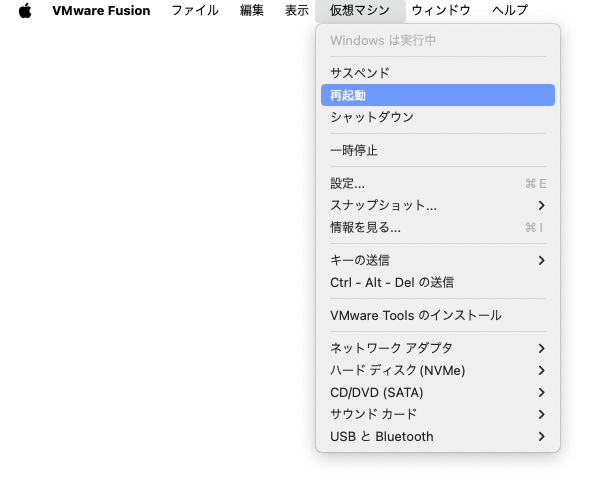
間に合いましたか?画面に「Time out.」と表示されていたら、間に合わなかったということです。その場合は仮想マシンを再起動してやり直してください。メニューバーの「仮想マシン > 再起動」です。
今度こそ間に合いましたか?3秒以内にキーを押さないとTime outになってしまうという鬼畜仕様です。でもご安心ください。何度でも無料でやり直せます。
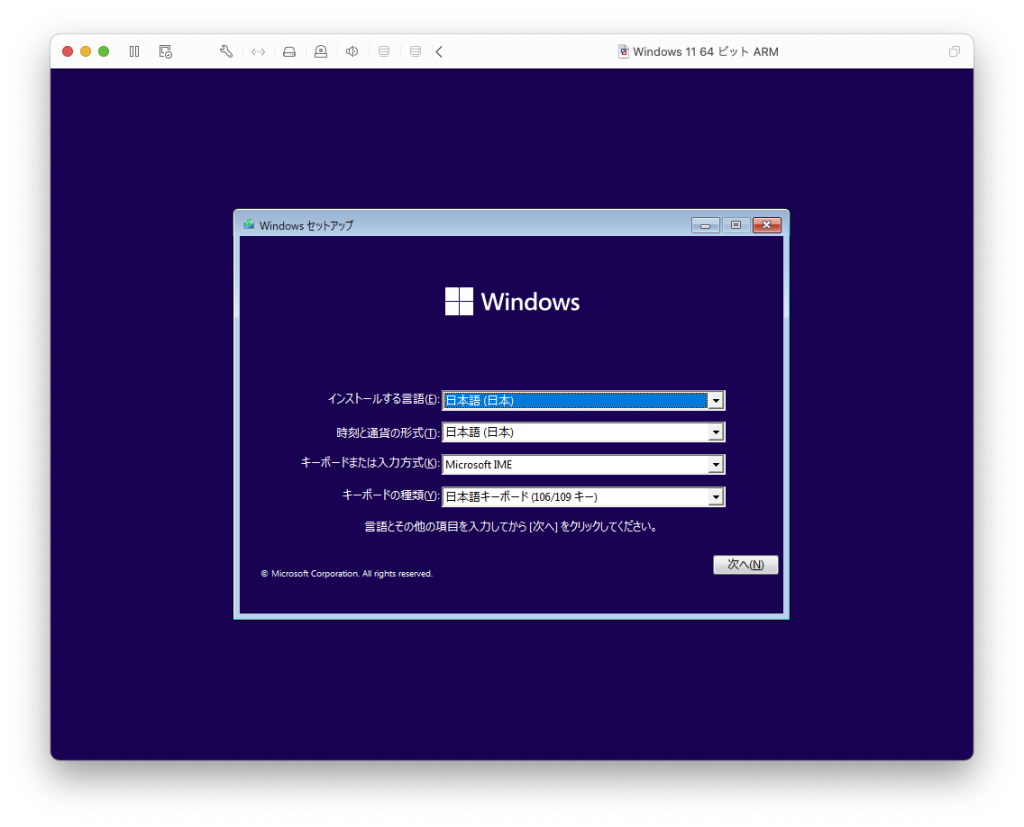
インストーラが起動したら「次へ」ボタンをクリックします。
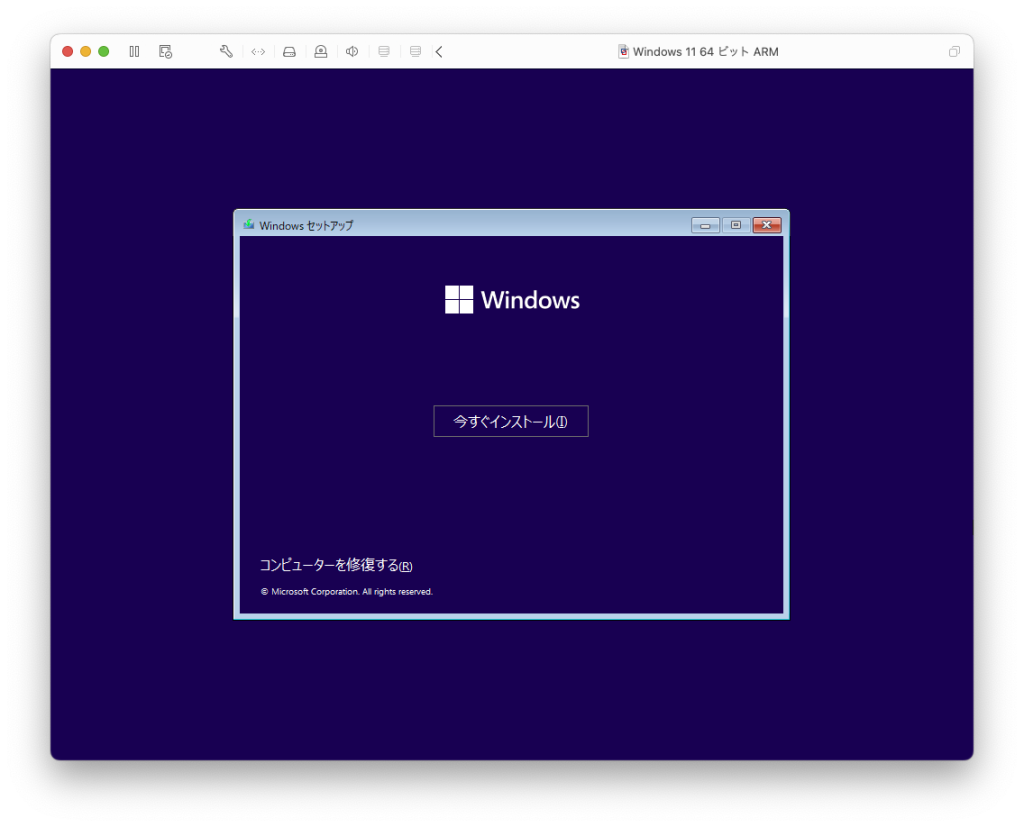
さらに「今すぐインストール」をクリックします。
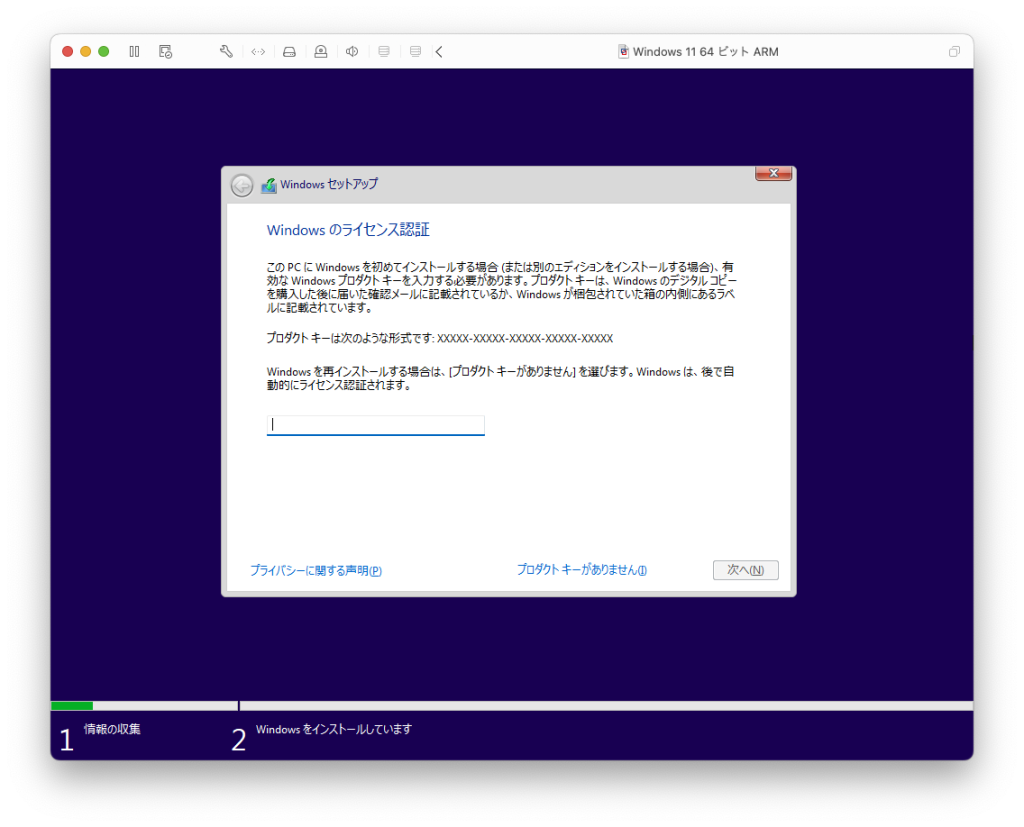
プロダクトキーを持ってるならば、入力して「次へ」ボタンをクリックします。持ってないならば「プロダクトキーがありません」をクリックします。
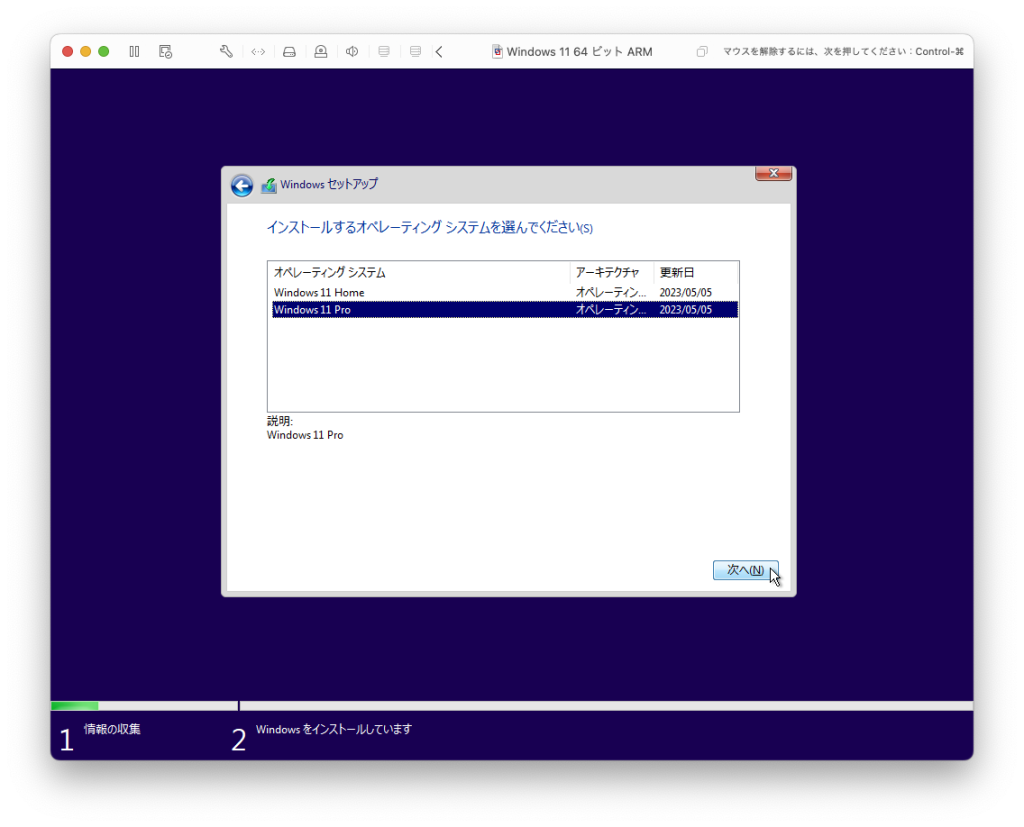
エディションの選択です。HomeまたはProを選びます。
ライセンス条項を読んで、チェックボックスにチェックを入れて、「次へ」ボタンを押します。
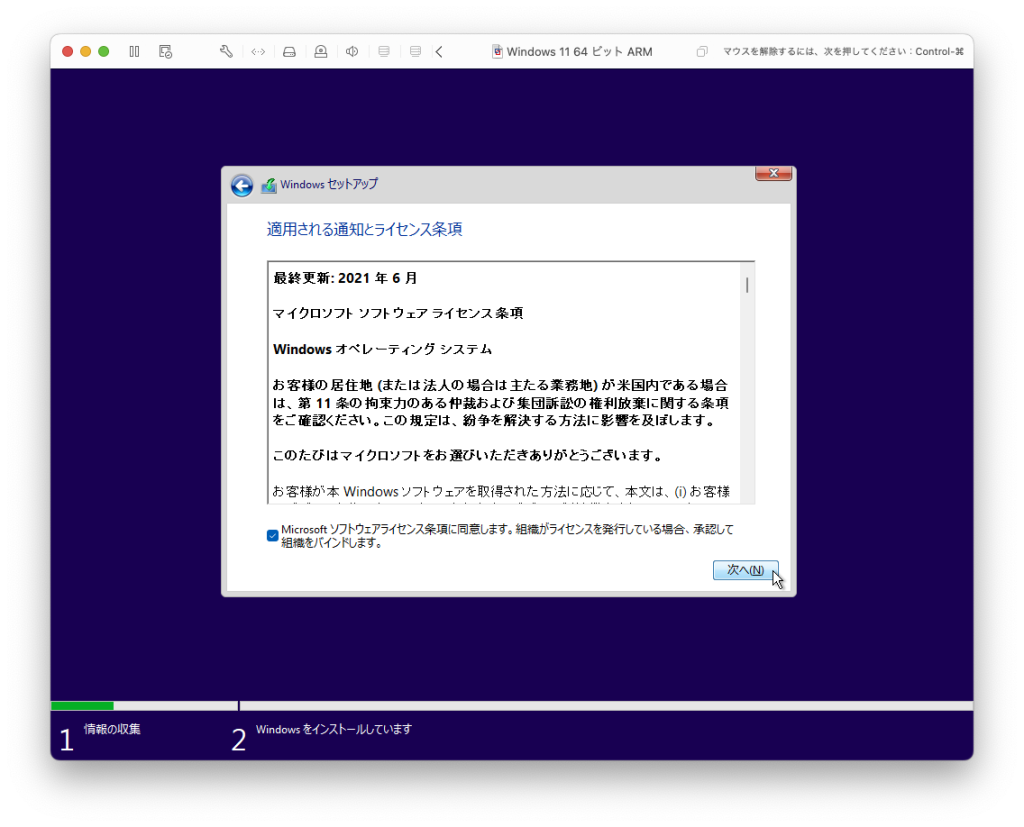
なお、ライセンス条項を読まずに、チェックを入れて、「次へ」ボタンを押しても次へ進むことができます。
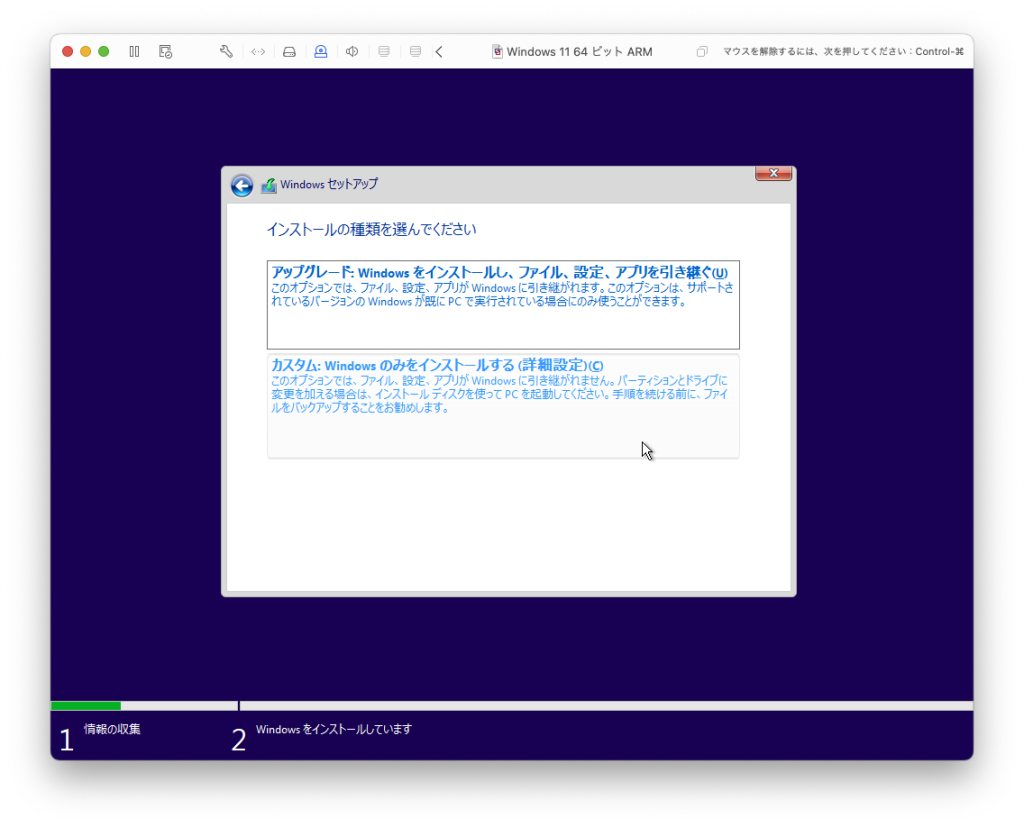
新規インストールならば、下の「カスタム」をクリックします。
「次へ」ボタンを押します。

どうでもいいけど、ここだけタイトルに「。」が付いてるのが気持ち悪いです。
Windowsのインストール場所を選んでください。←これ
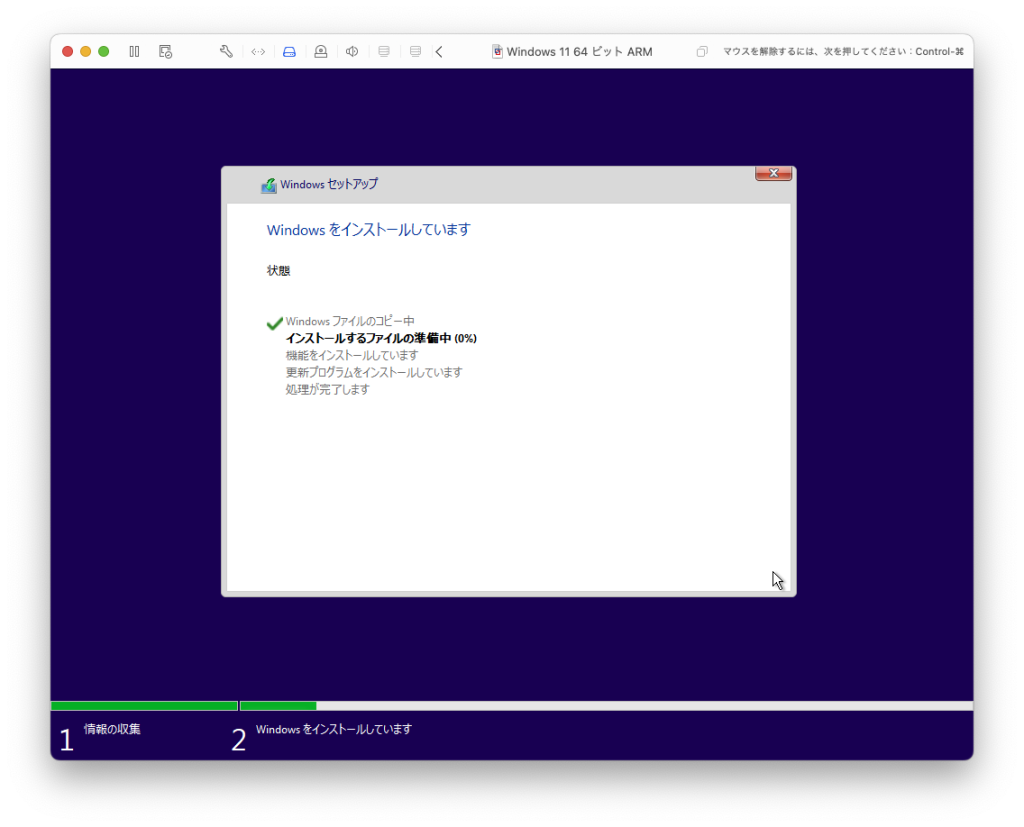
Windowsのインストールが始まるのでしばらく待ちましょう。終わると自動的に再起動します。
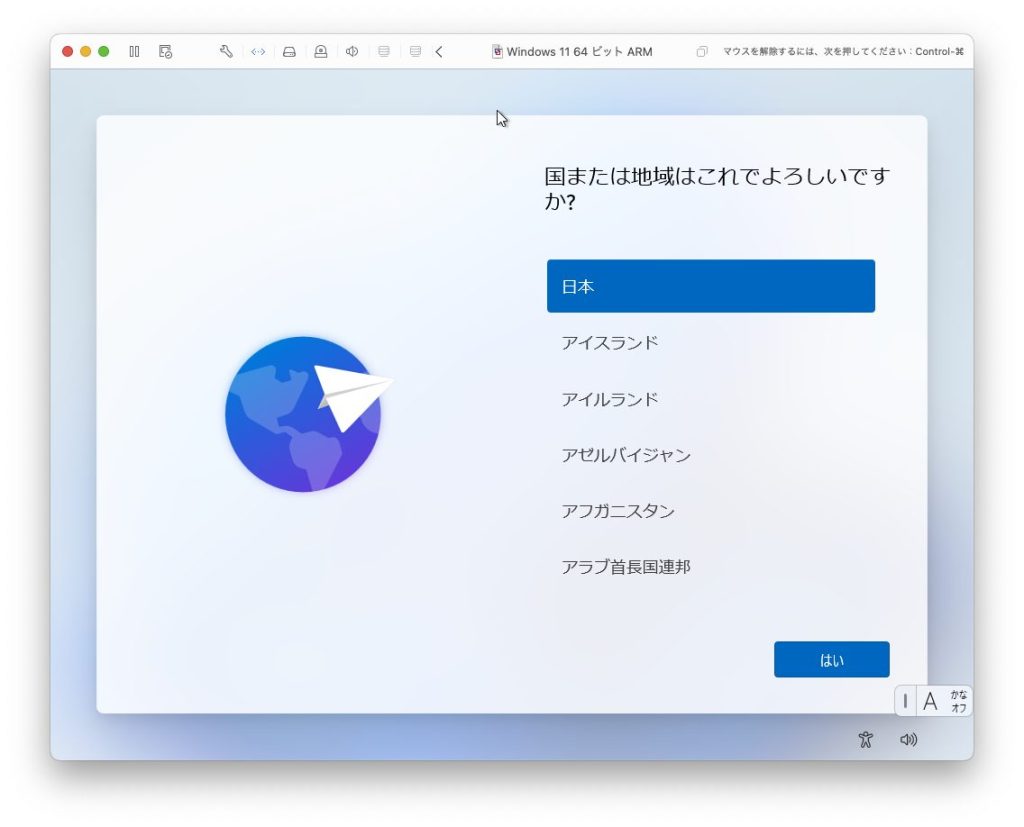
国を選んで「はい」をクリックします。
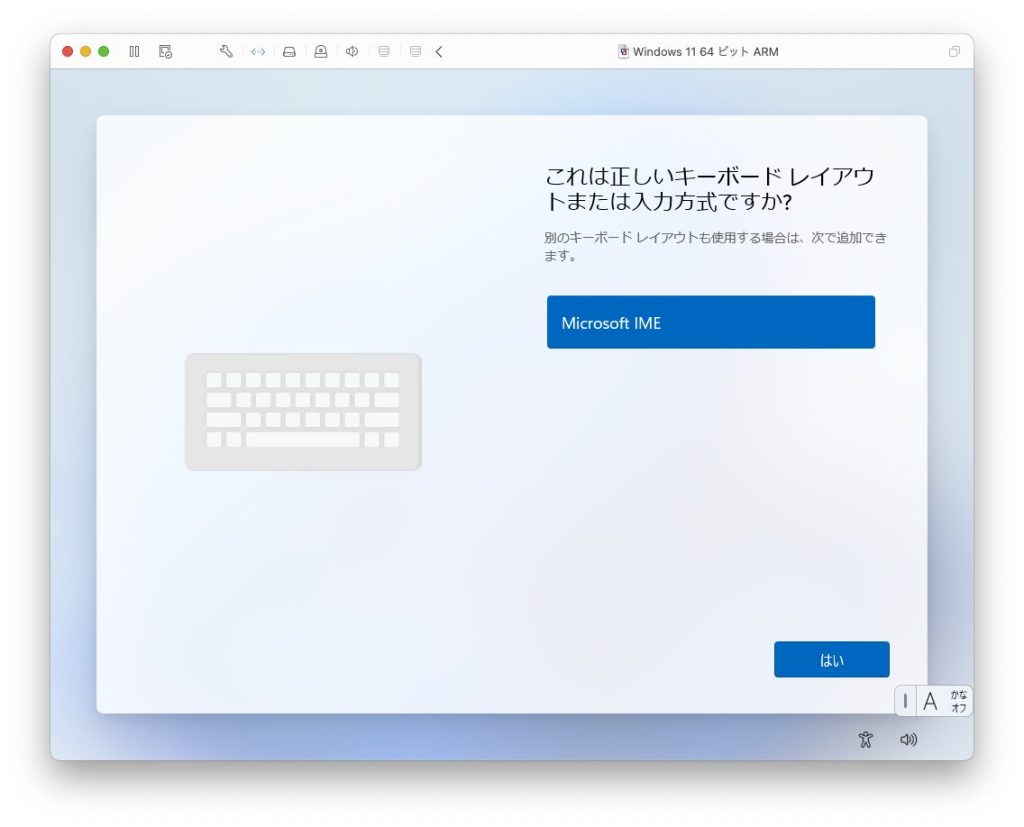
「はい」をクリックします。
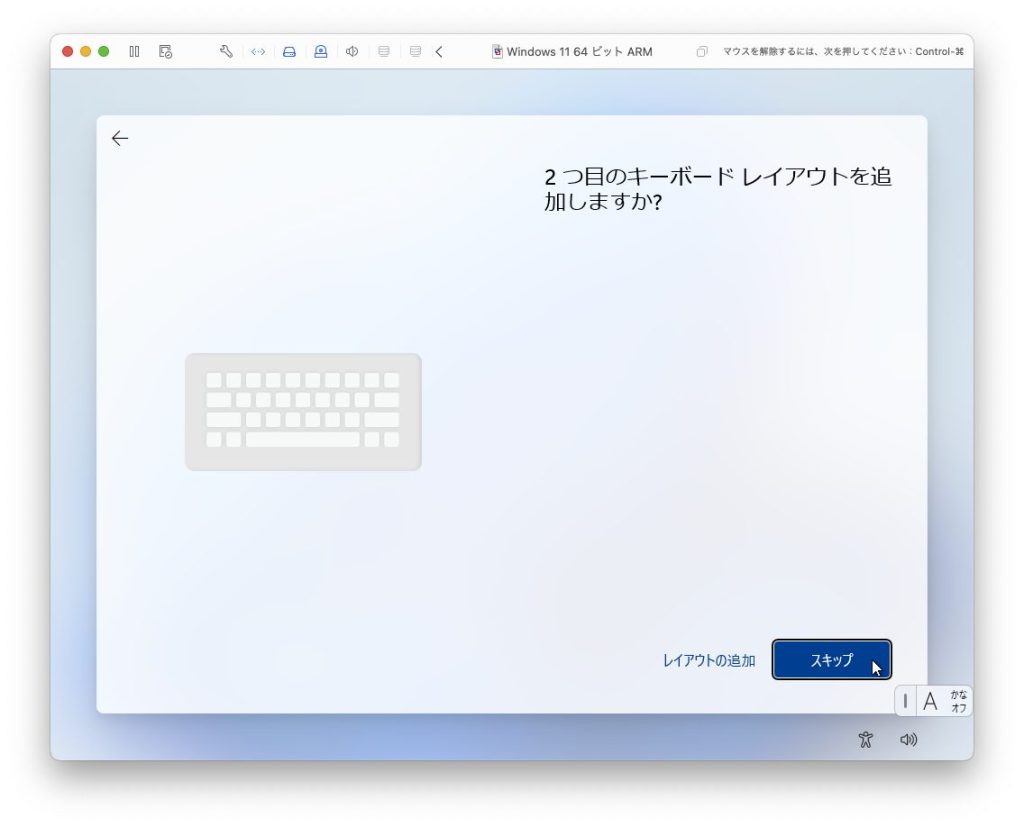
2つ目のキーボードは「スキップ」します。もちろん追加してもOKです。
ここでまた仮想マシンが再起動します。
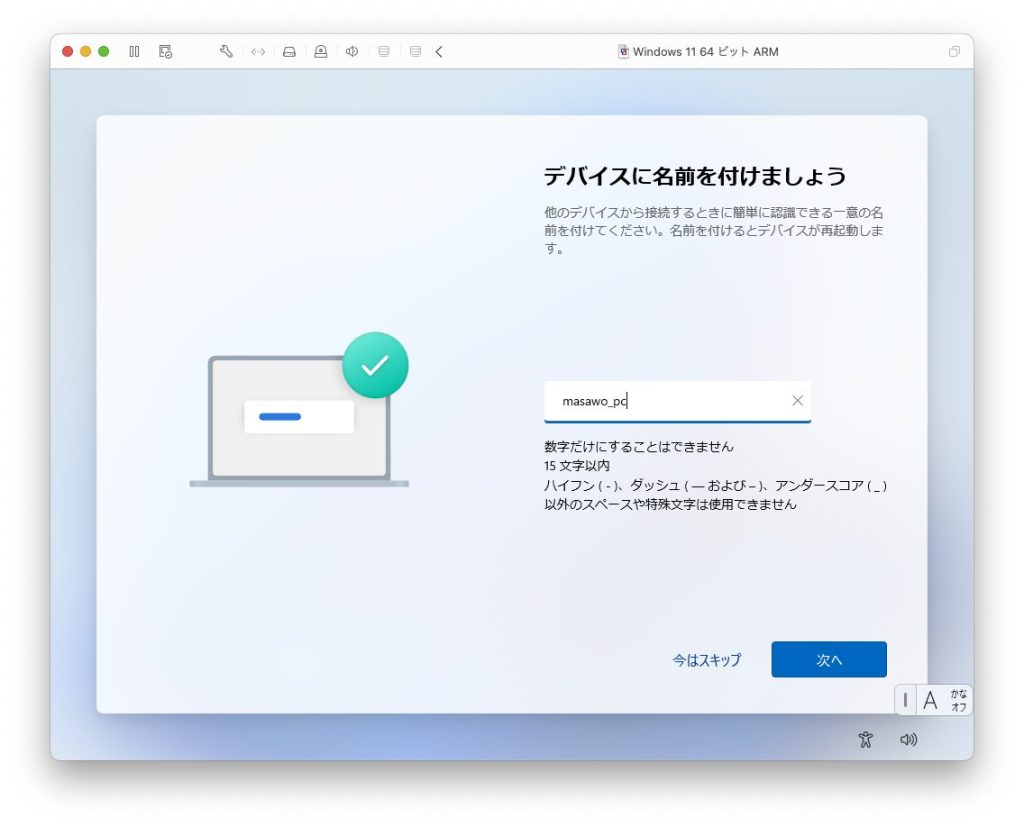
適当な名前をつけて「次へ」をクリックします。
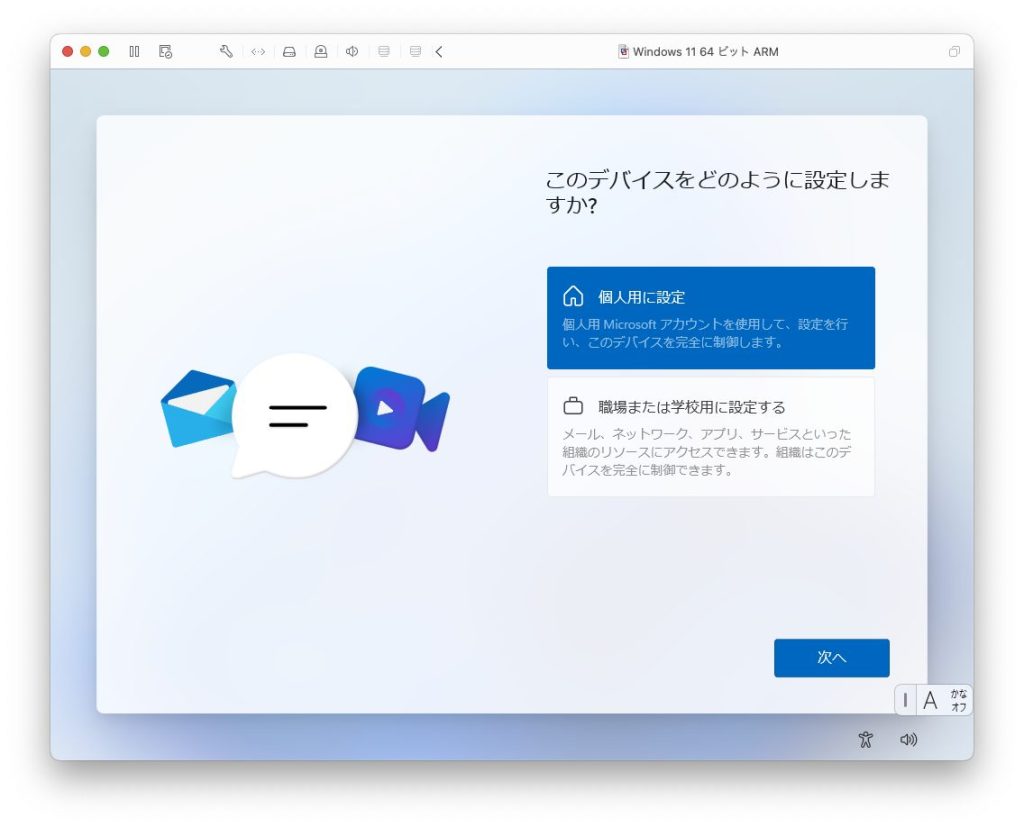
ここでは「個人用に設定」を選択して「次へ」をクリックします。
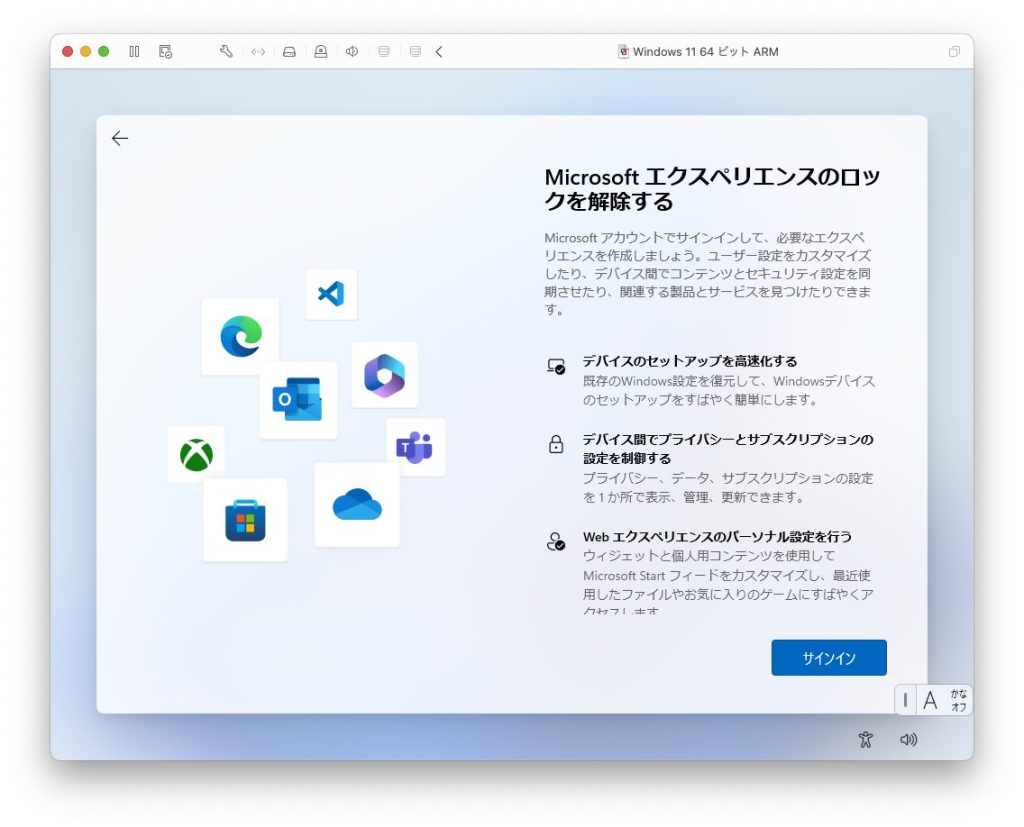
まず、1つ目の画面。読んでもなに言ってるかわかりませんが「サインイン」をクリックします。
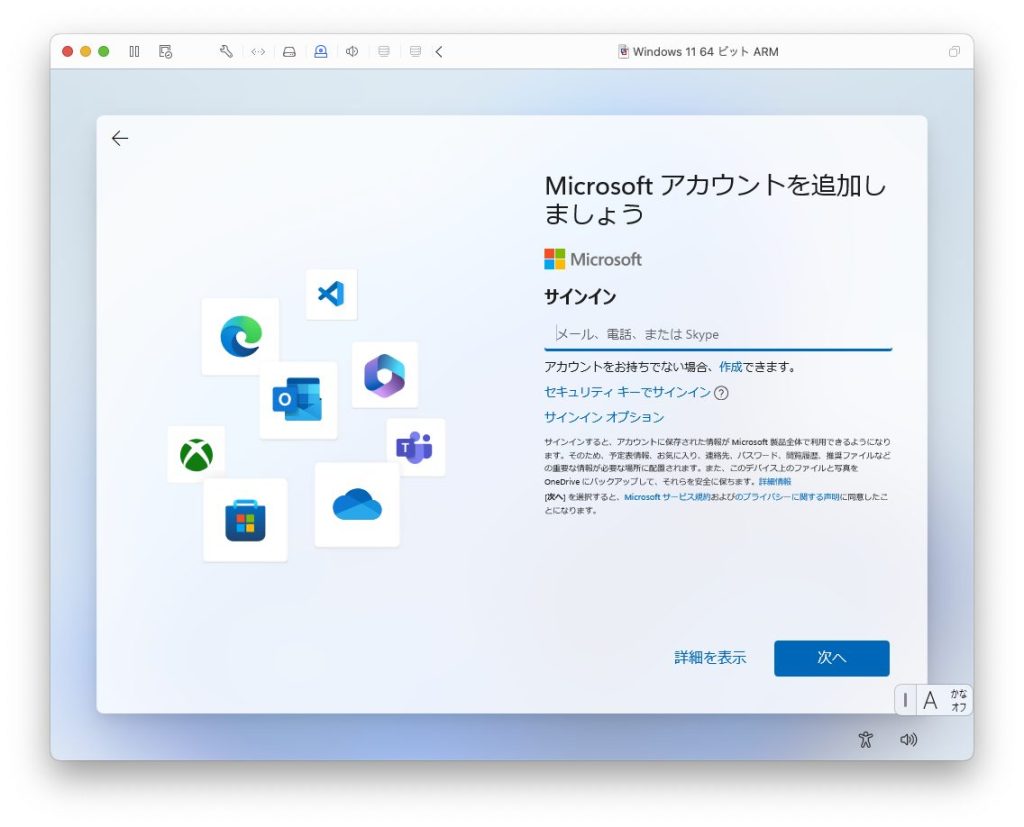
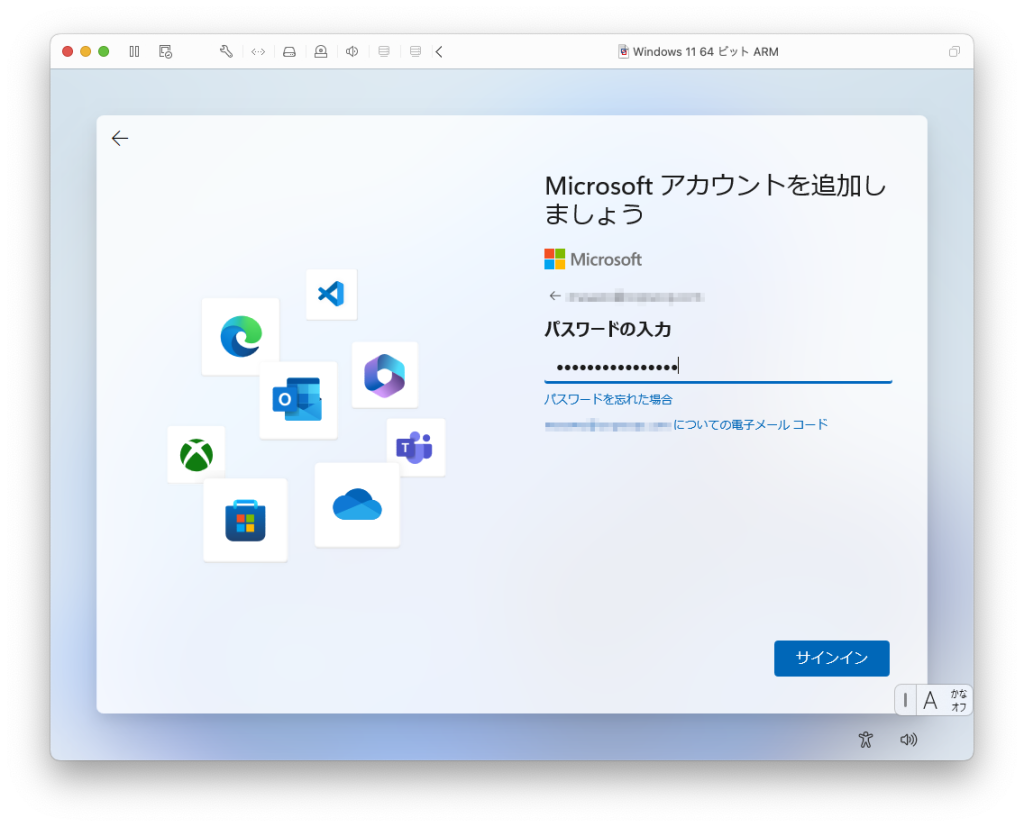
次の画面では、Microsoftアカウントを入力して「次へ」をクリックします。
パスワードを入力して「サインイン」をクリックします。
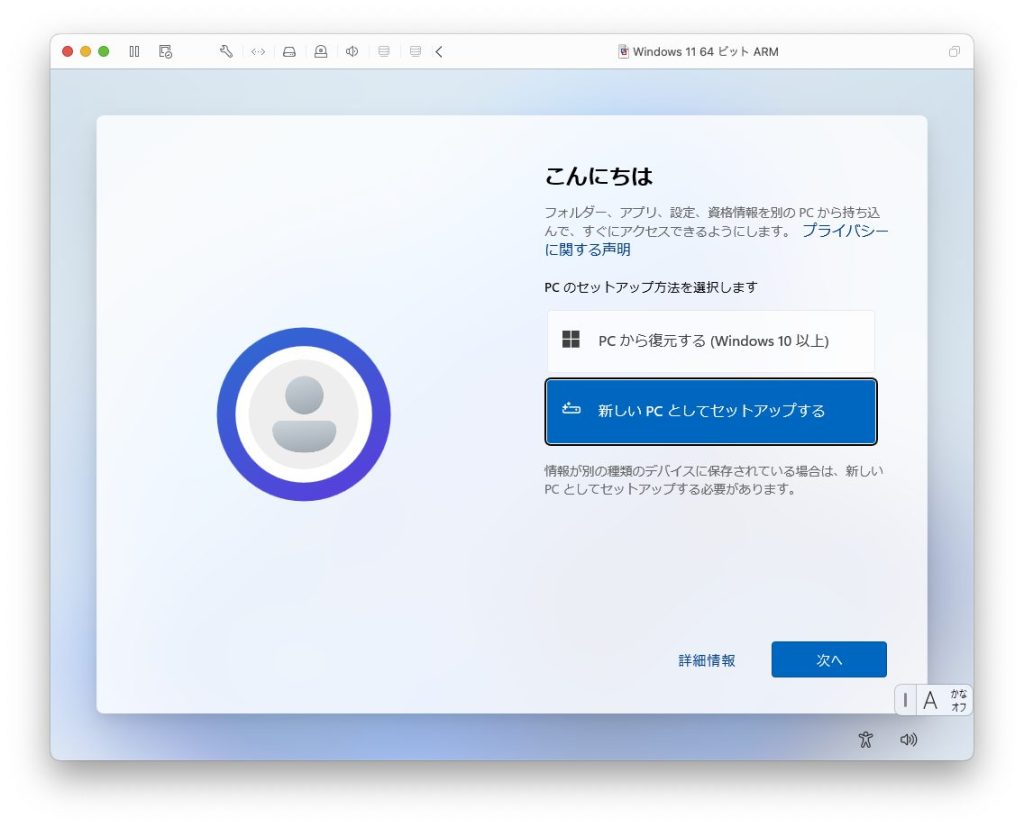
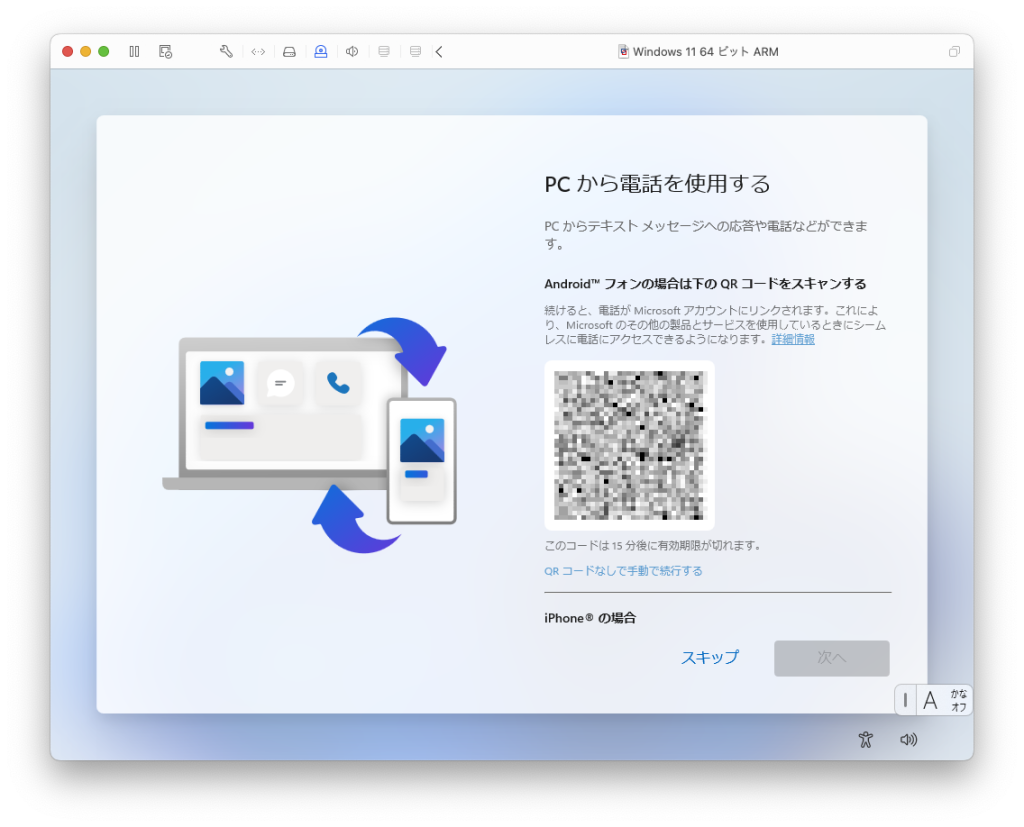
はい、こんにちは。なぜか突然あいさつされましたけど「新しいPCとしてセットアップする」を選択して「次へ」をクリックします。
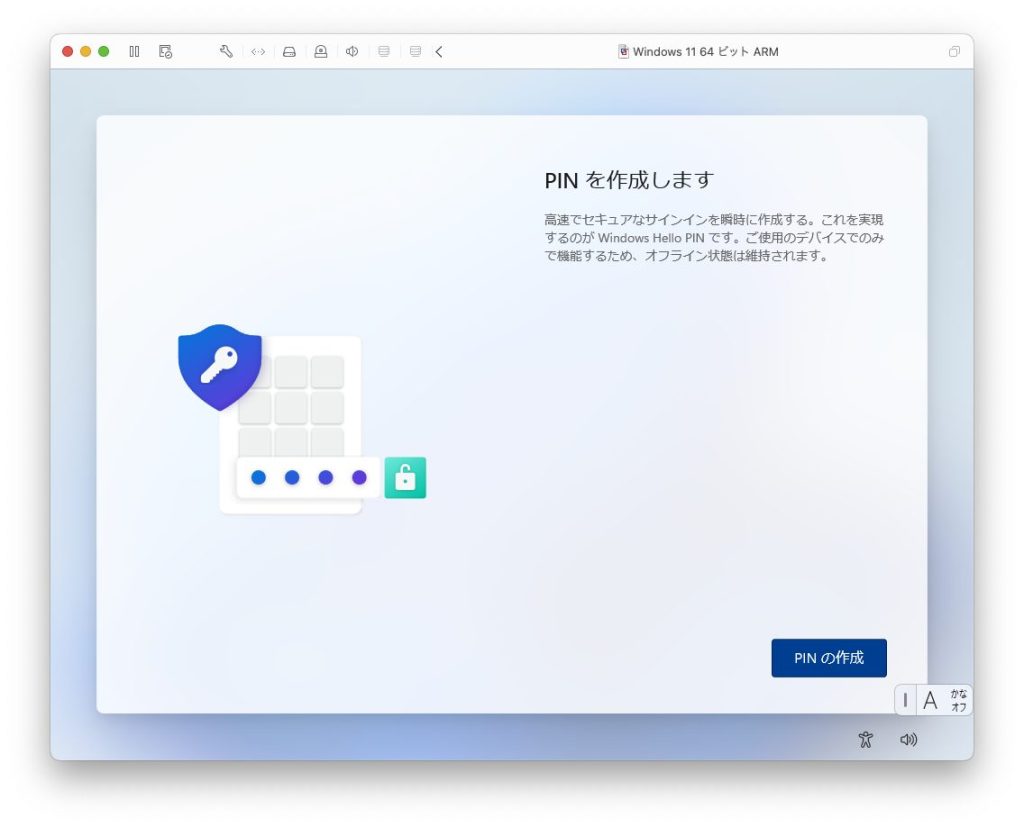
「PINの作成」をクリックします。
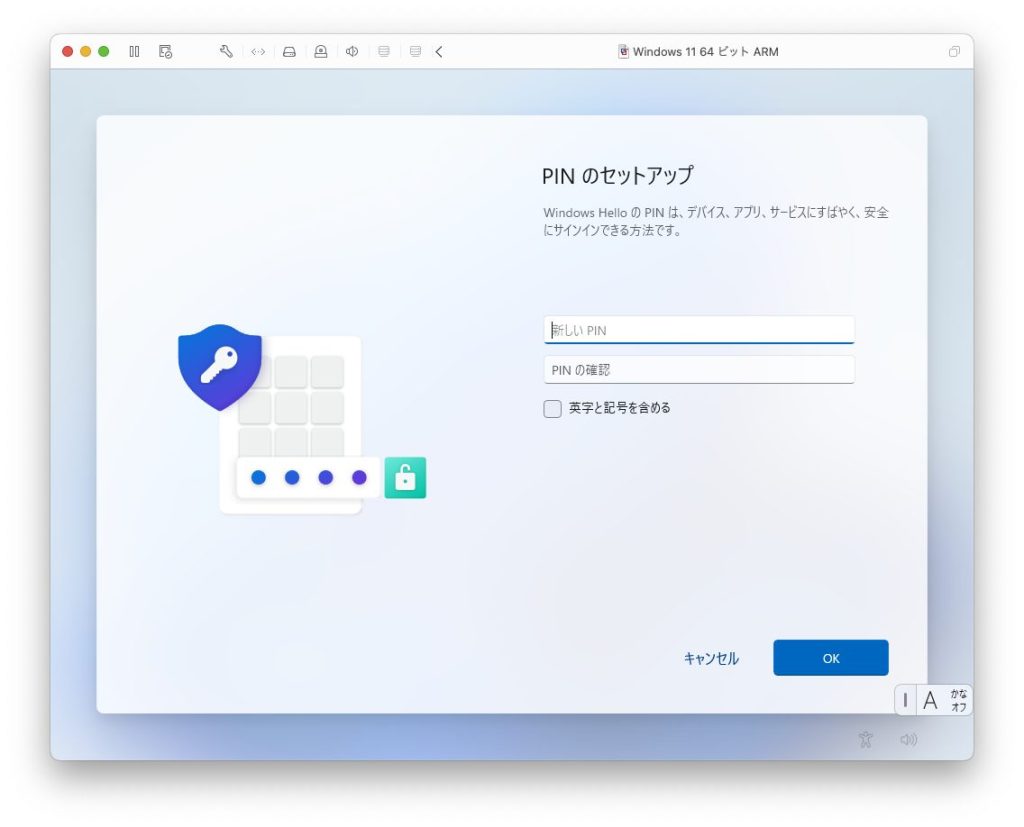
任意のPINを設定して「OK」をクリックします。
プライバシー設定を選択し「同意」をクリックします。

エクスペリエンスってなんやねんと誰しもが思うことでしょう。興味・関心のある分野にチェックを入れておくと、広告やおすすめの〇〇がパーソナライズされるそうです。

使わないので「スキップ」しました。
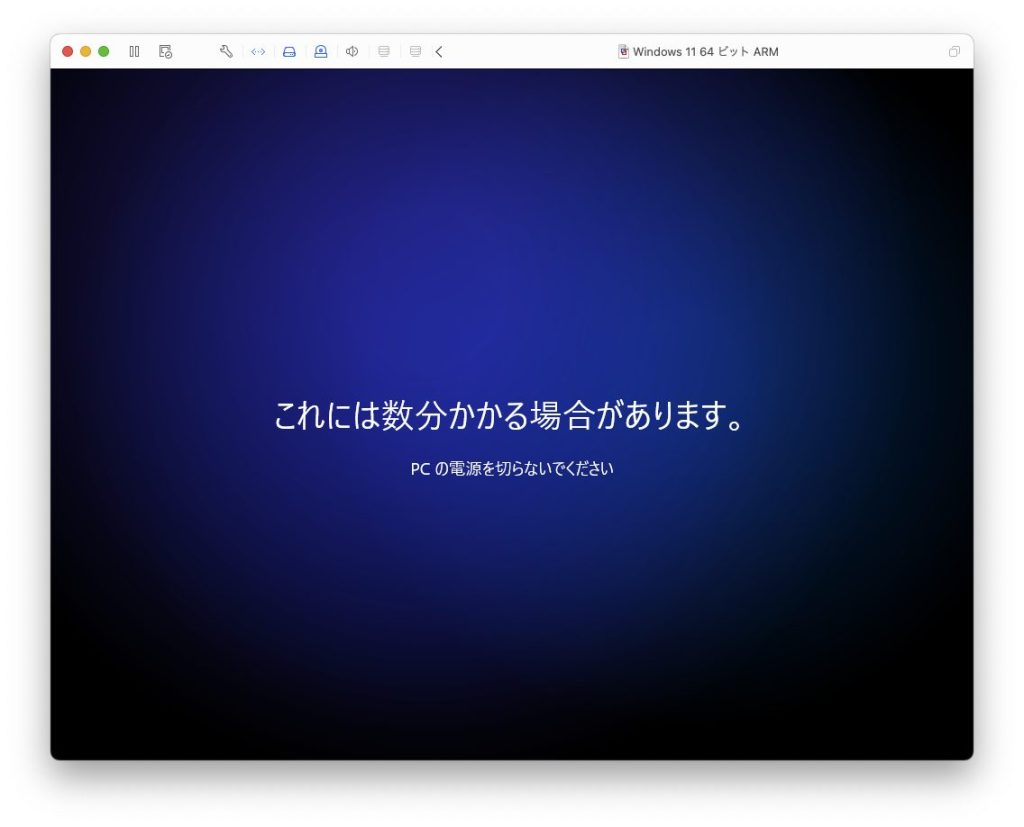
まもなくインストール完了です。
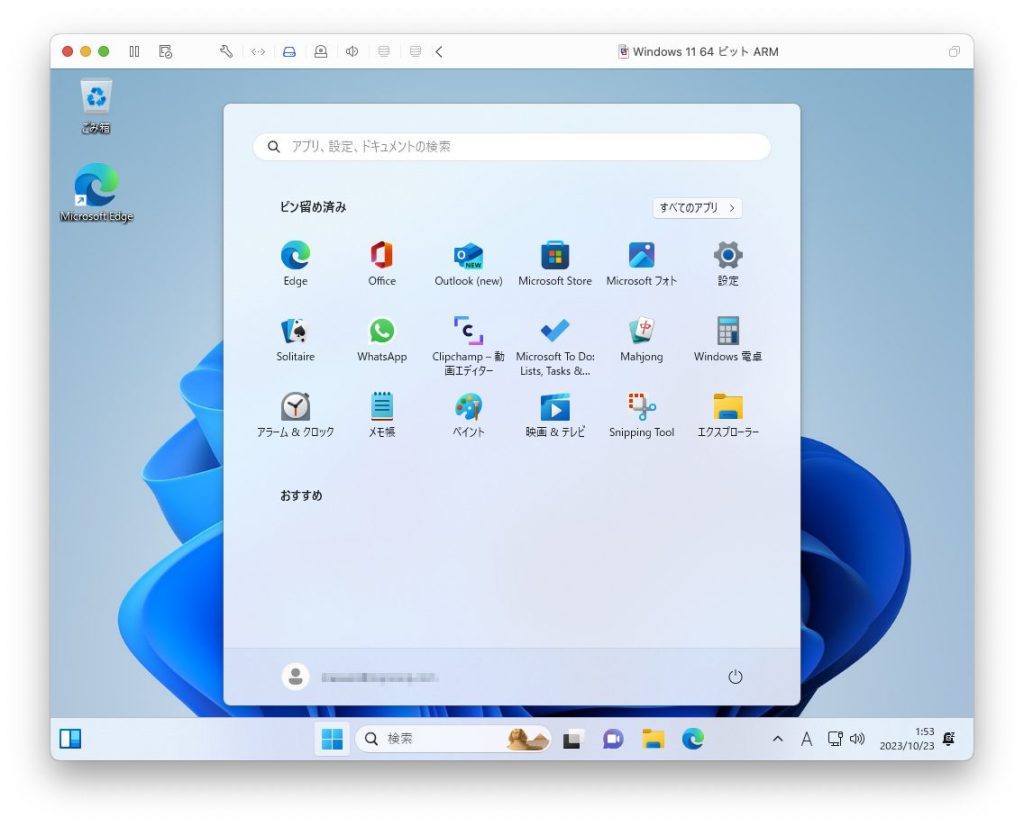
無事、インストールが完了しました。いえい。
VMware Toolsのインストール
VMware ToolsをゲストOSにインストールすると、ホストOSとゲストOSの連携、各種パフォーマンスの向上を実現することができます。
Macのメニューバーの「仮想マシン > VMware Toolsのインストール」を選択します。
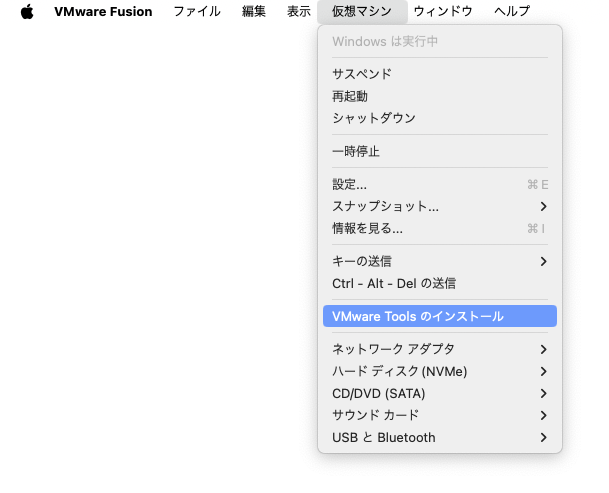
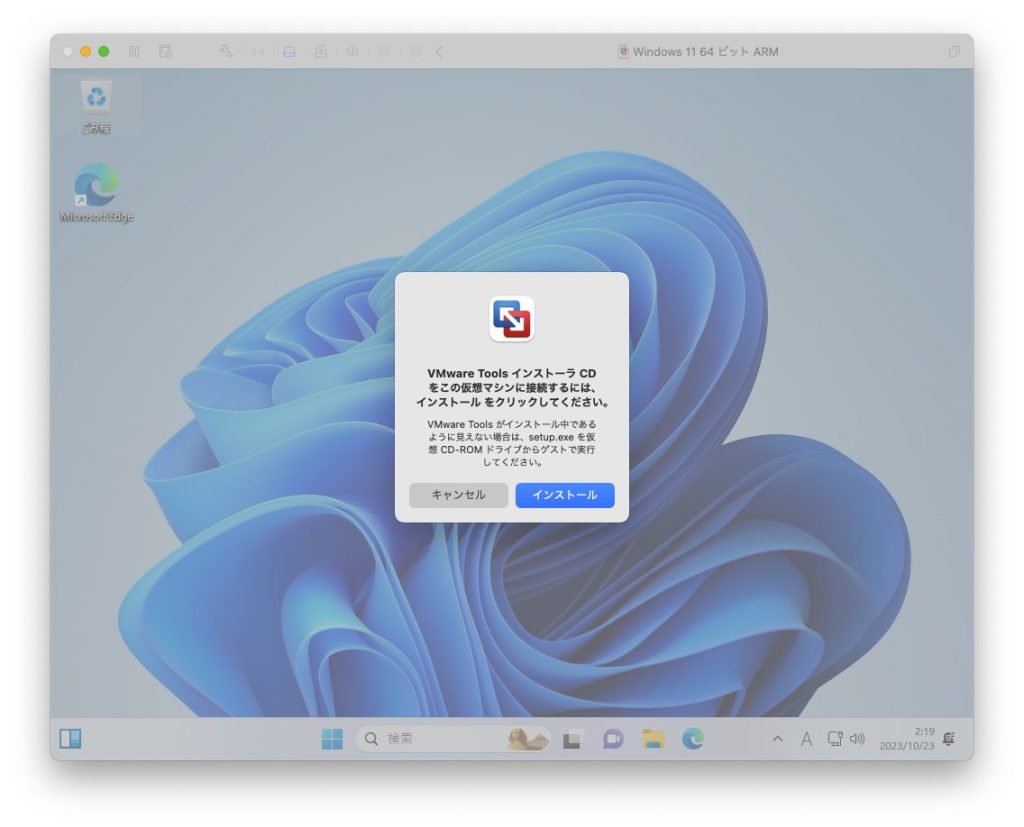
次のようなダイアログが表示されたら「インストール」ボタンをクリックします。
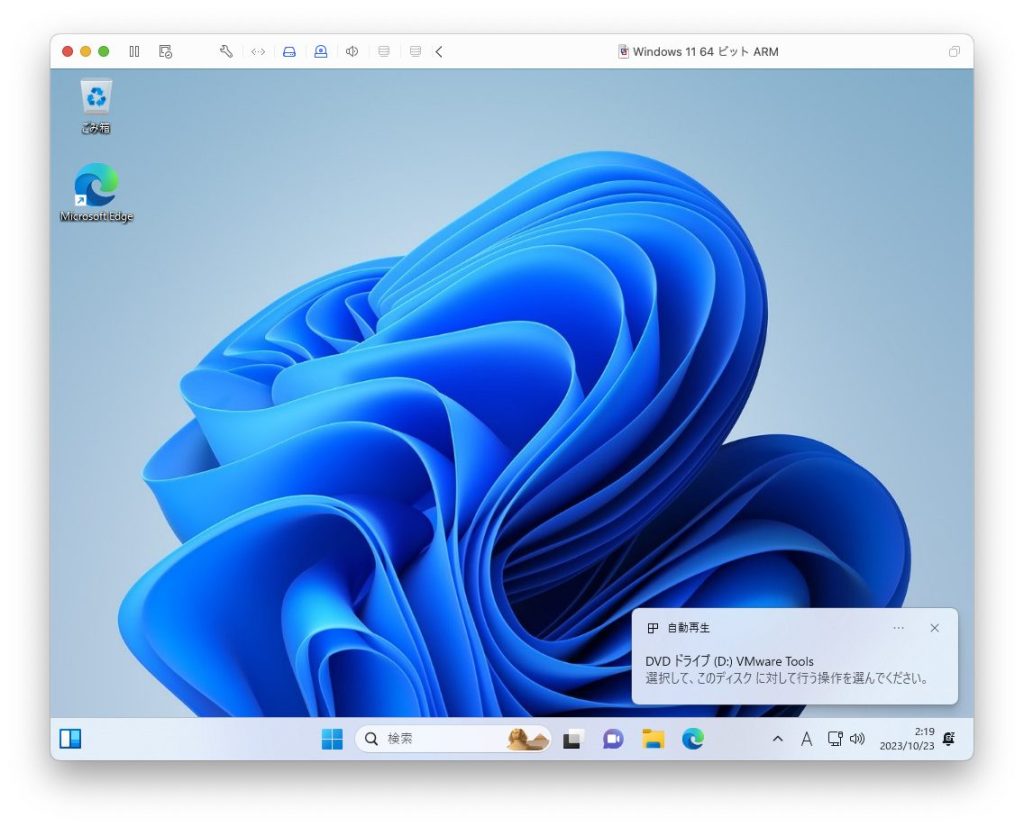
ただし、これでインストールが完了するわけではないのでご注意ください。
画面右下にポップアップが表示されたらクリックします。
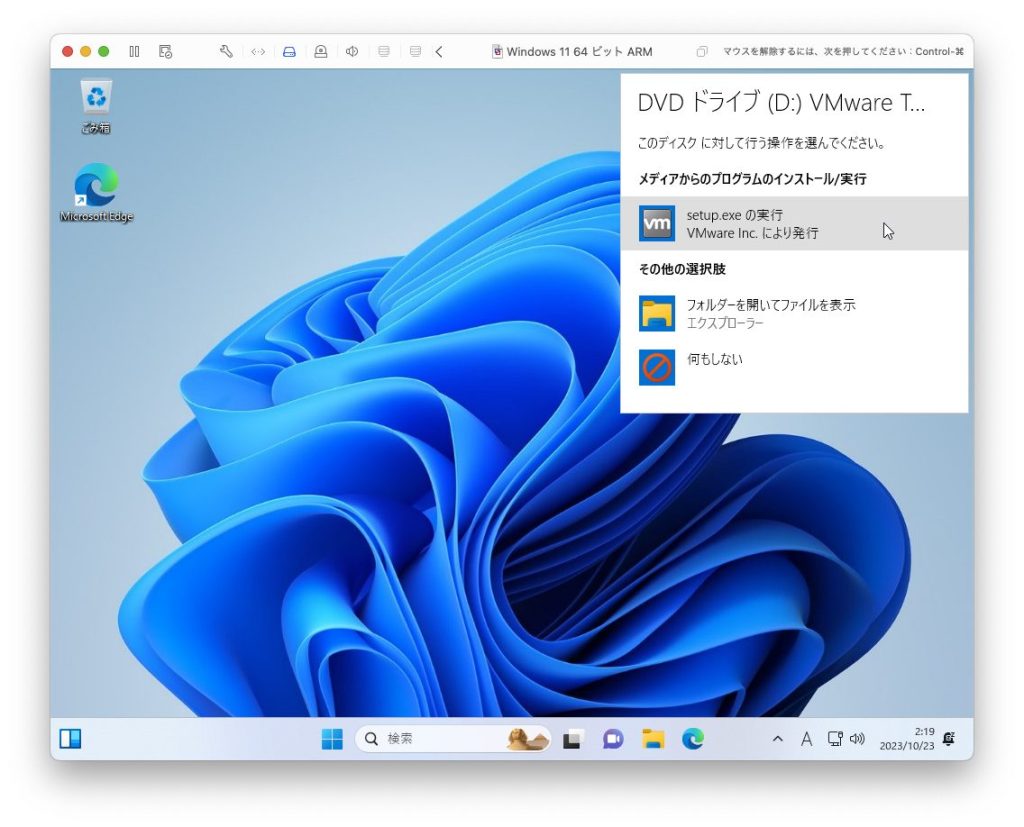
右上にポップアップが表示されたら「setup.exeの実行」をクリックします。
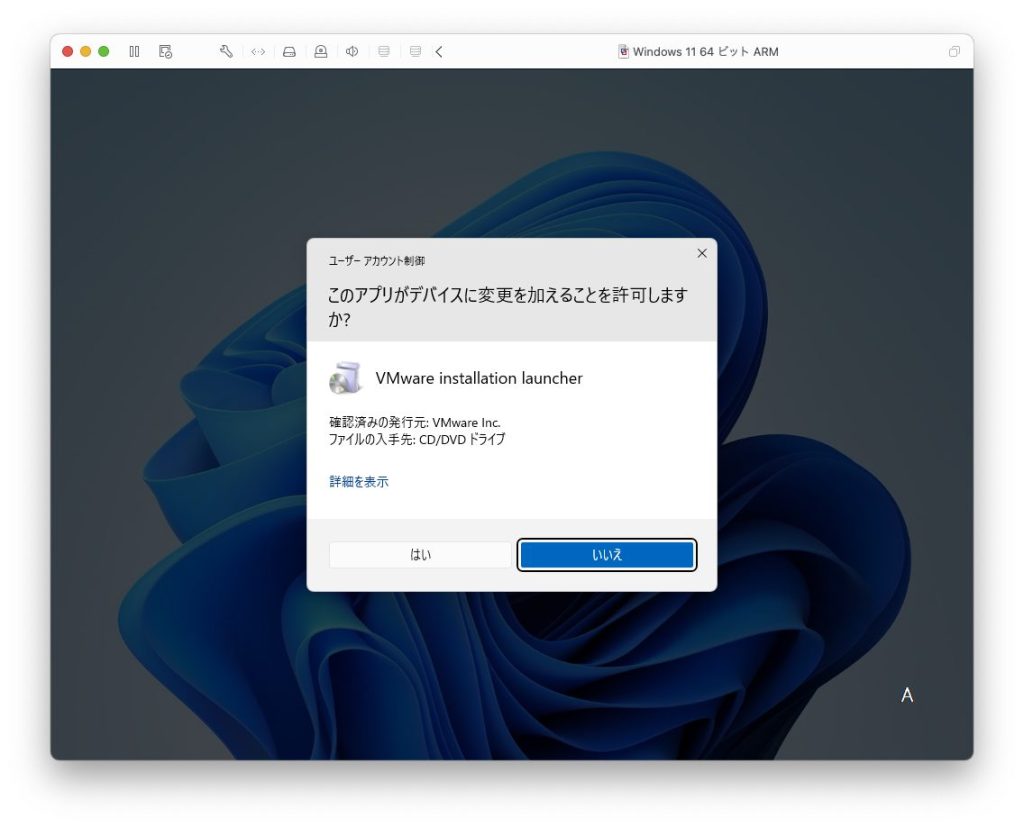
このアプリがデバイスに変更を加えることを許可しますか?と聞かれるので「はい」をクリックします。
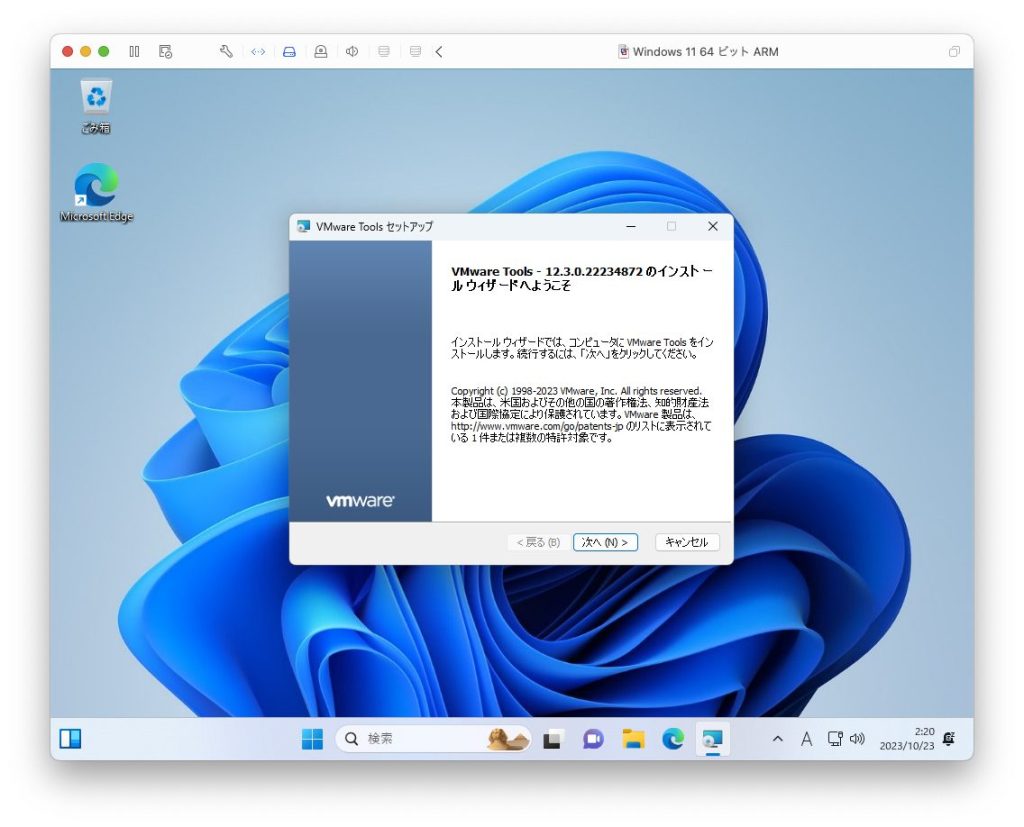
「次へ」ボタンをクリックします。
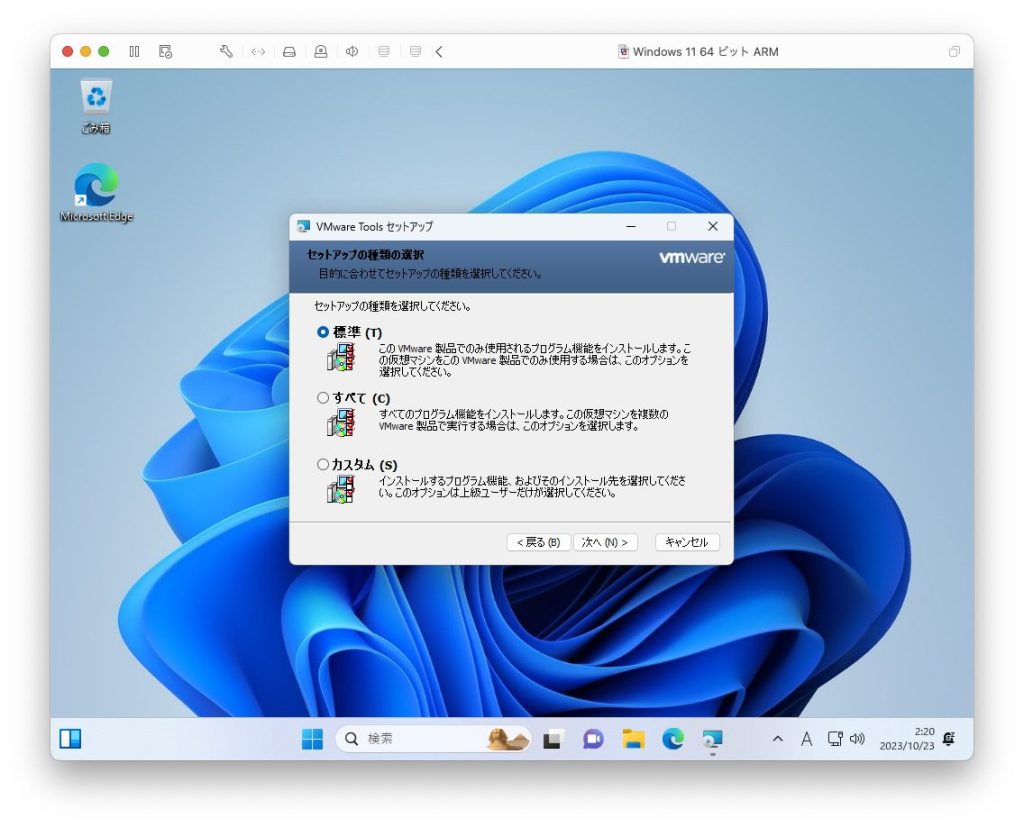
セットアップの種類は「標準」を選択します。
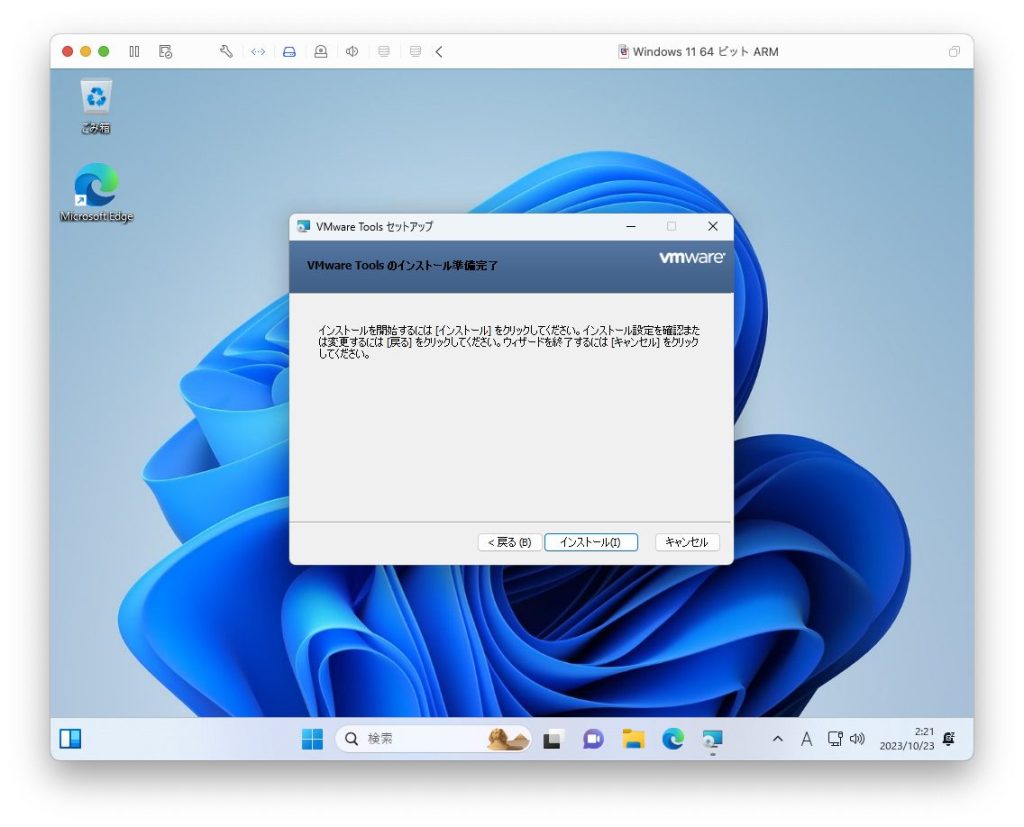
「インストール」をクリックします。
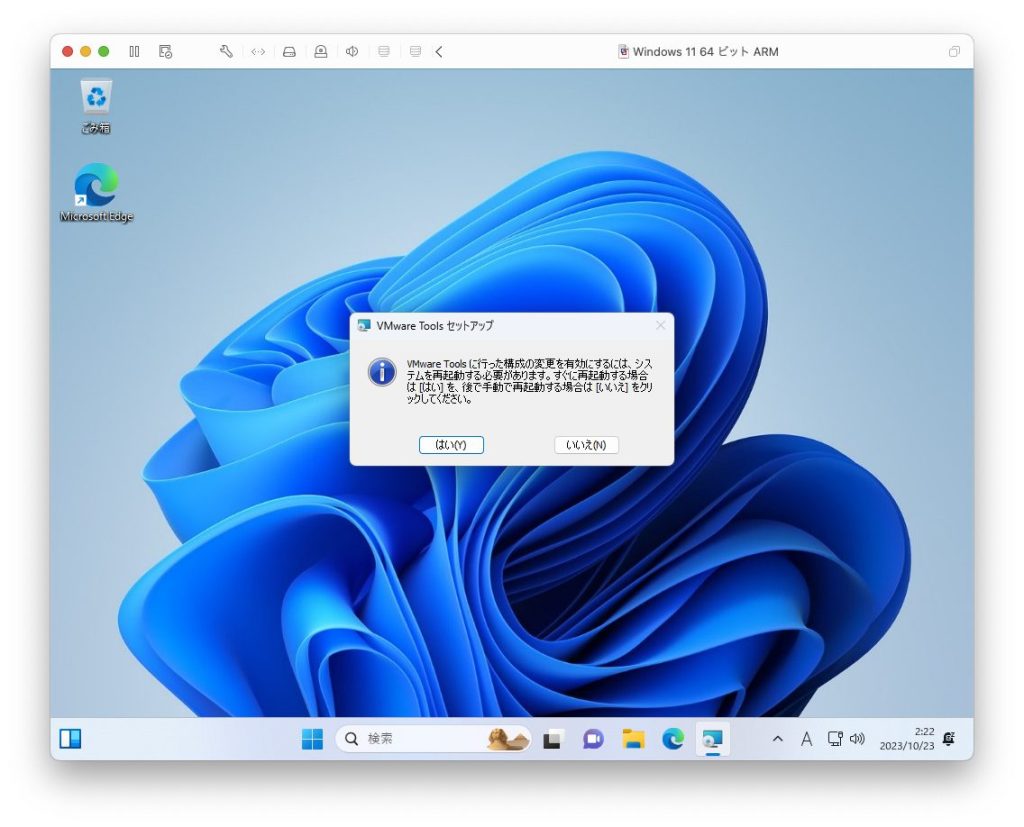
インストールが終わったら「完了」をクリックします。
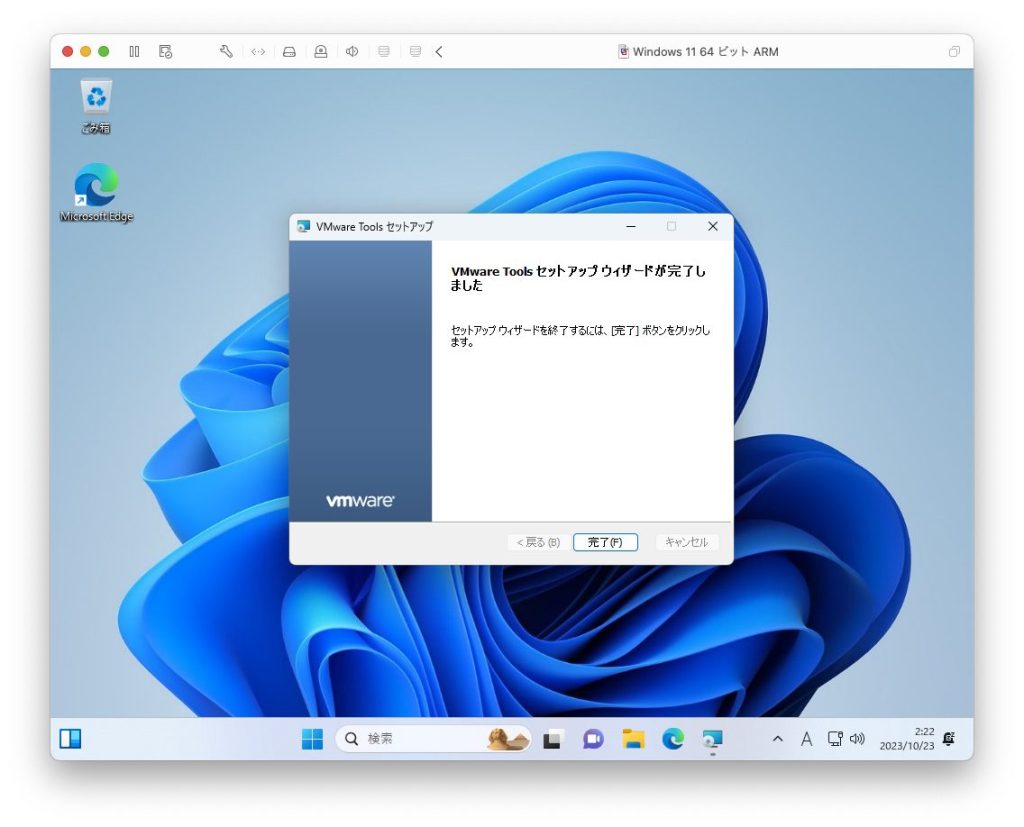
システムを再起動するとVMware Toolsが有効になります。
さいごに
というわけで、VMware Fusion 13と比較して、Windowsのインストールがとても簡単になりました。DirectXにも対応して、これでようやくParallels Desktop
![]() と互角に戦えるレベルになったのではないでしょうか。
と互角に戦えるレベルになったのではないでしょうか。
他の仮想化ソフトとの比較記事もよろしければどうぞ。

でわでわ
コメント